Belfort
Absorbed into France in the early 1600s,
Belfort, lies in a gap between
the Vosges and Jura Mountains, making it a natural invasion route into
France.
In 1678, Vauban was set to work improving the town's
fortifications, demolishing the old defenses and extending the town to the River Savoureuse.
Construction was complete in 1703. Jura sandstone was used,
which was locally available and thought to harden when exposed to the
air. Improvements were made in the fortifications in the early
1800s by General Haxo.
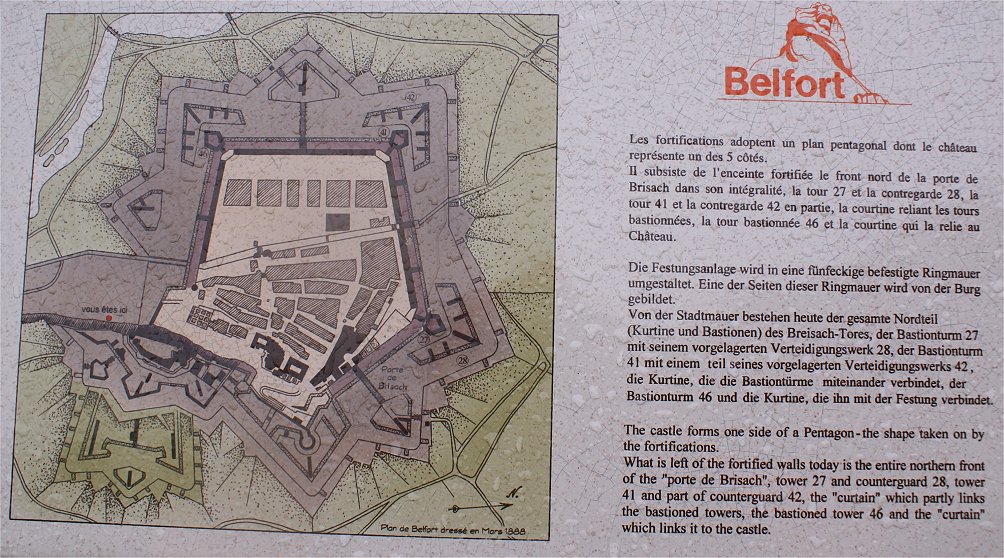
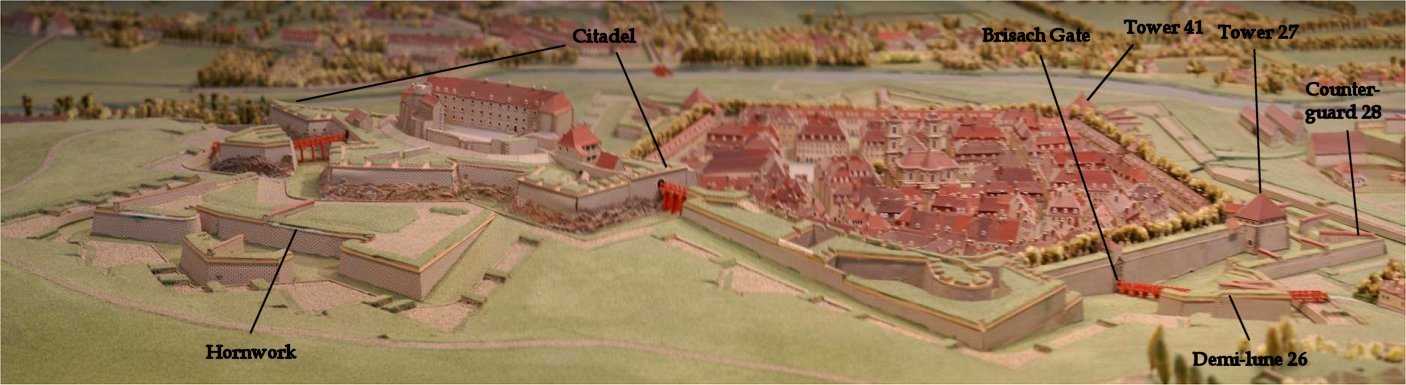
Belfort is well worth a visit. The citadel, on the lower portion
of the map, is on bluffs overlooking the city. Vauban designed a
hornwork in front of the citadel, but it was replaced in the early 1800s by
Haxo's design. In the lower part of town, Vauban used
his tower bastion design with a detached bastion, or counterguard, in
front of it. Neuf-Brisach, just a short drive away, is the best known for this design.
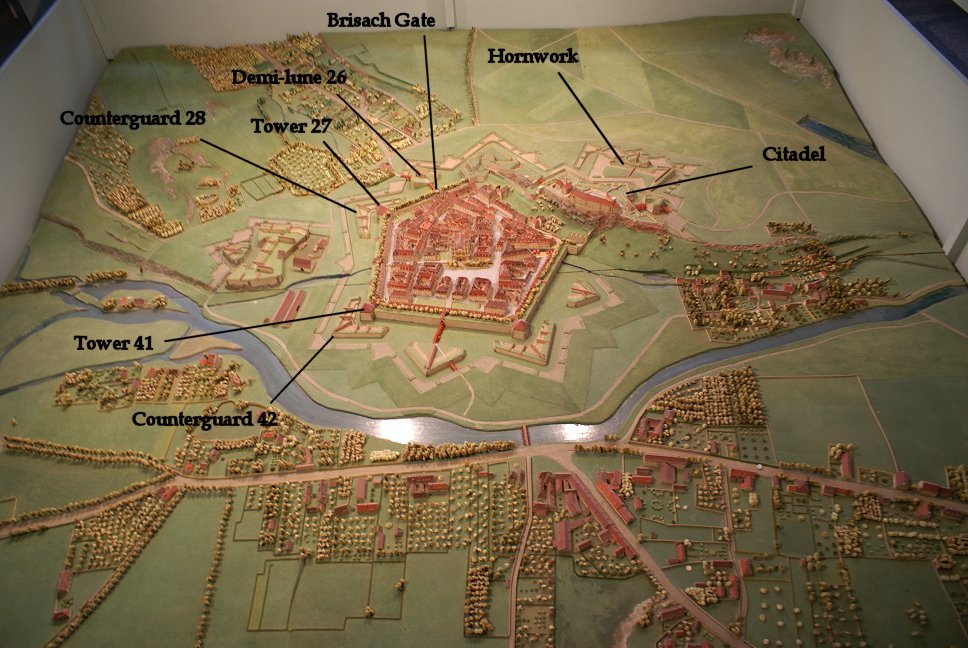
This model in the city history museum housed within the citadel shows
Vauban's design.
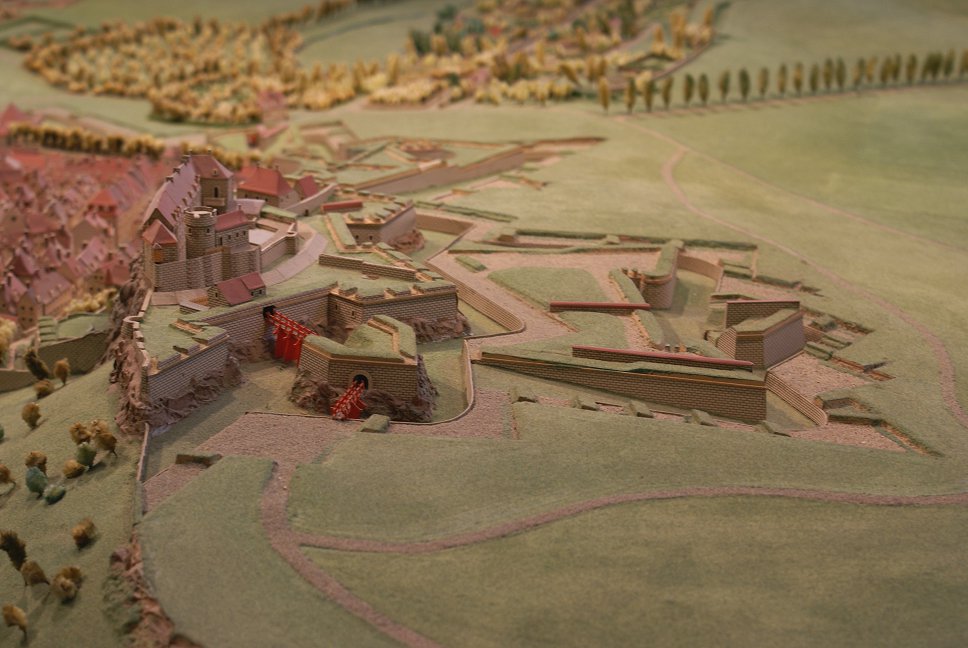
The medieval castle was converted into a citadel, and a detached
fort was built on La Miotte hill. Note the tower bastions and
detached
bastions.
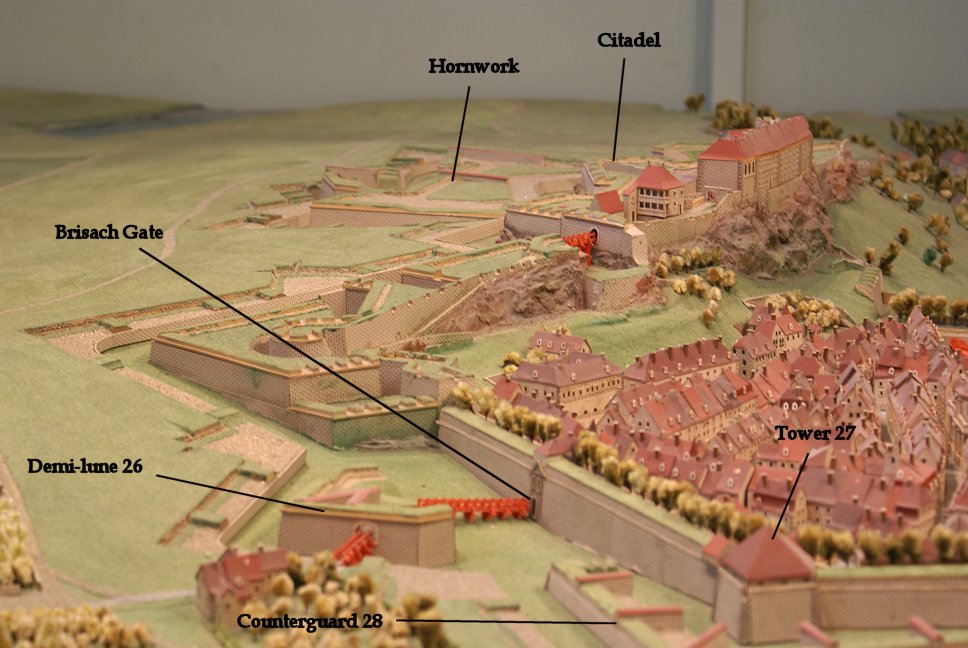
This is the portion of town with preserved fortifications, the citadel
atop the bluffs along with Brisach Gate. Below is a sign showing
the cross section of the uphill portion.
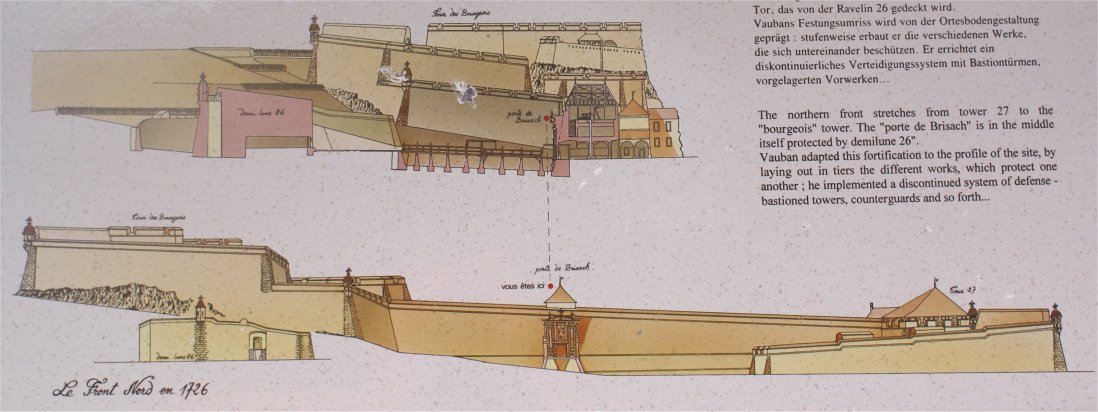
Unlike some other, more theoretical, designers, Vauban believed that
each fort should be adapted to the specific terrain at the location.
Here, terracing was useful, but in other, lower fortress sites,
he might
make use of complex water works to create a wet ditch, or moat.
At Belfort because of the hilly terrain, he made frequent use of
traverses to protect against enfilade fire.
Although Vauban did not categorize his designs into 'systems', later
fort designers considered Vauban to have had three systems.
Belfort, with its detached bastions, was considered an example of
the second system. Only one fortress, Neuf Brisach, was made according to his third system.
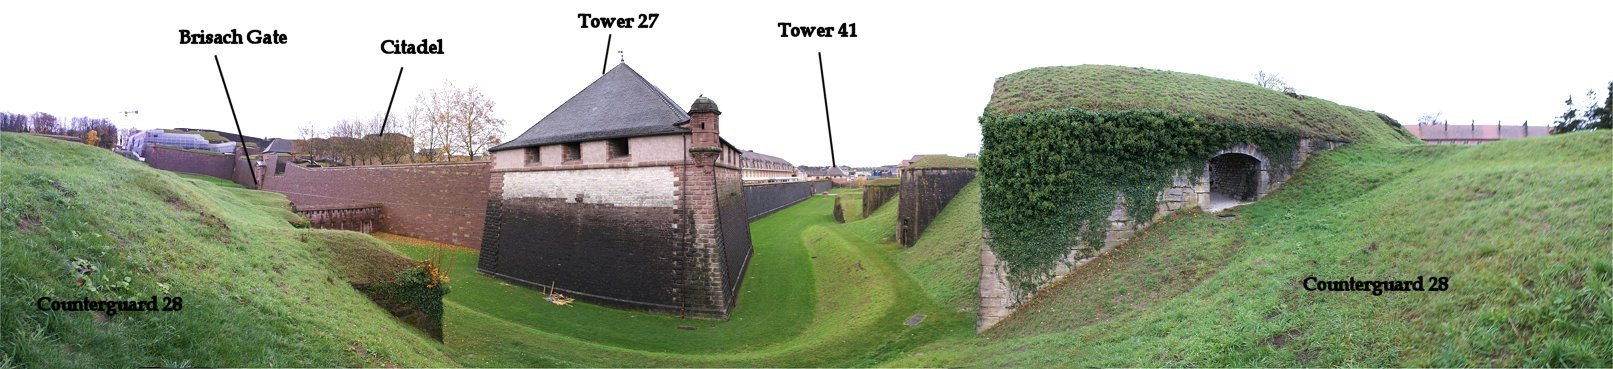
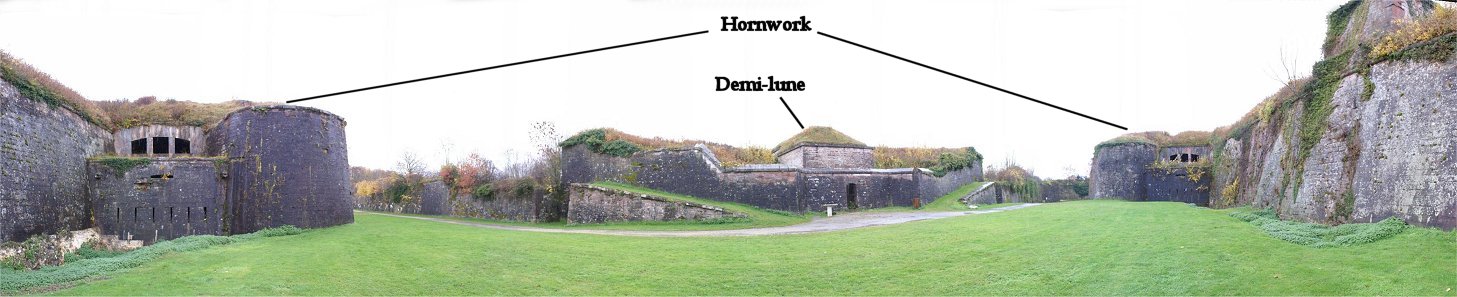
This panorama is from the inner portion of a detached bastion, counterguard
28, looking at the
tower bastion that it protects. Strong stone traverses are
prominent features of the counterguard. You can see a walkway through the one at right. The tiled rooves on the
tower bastions were added later. A wall connects the detached
bastion, or counterguard, to the wall. Firing ports on this
connecting wall help
protect the ditch. The curtain wall extends toward the right to
Tower bastion 41, and another curtain wall extends to the left to
the
Brisach Gate, then the walls continue further uphill to another
bastion, then to the
citadel, which you can see on the high ground.
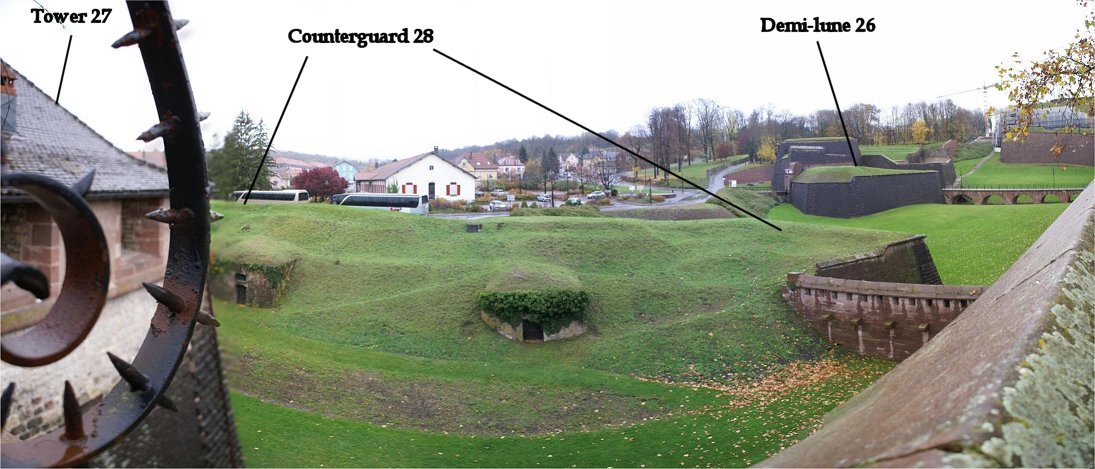
From the curtain wall near the tower bastion.
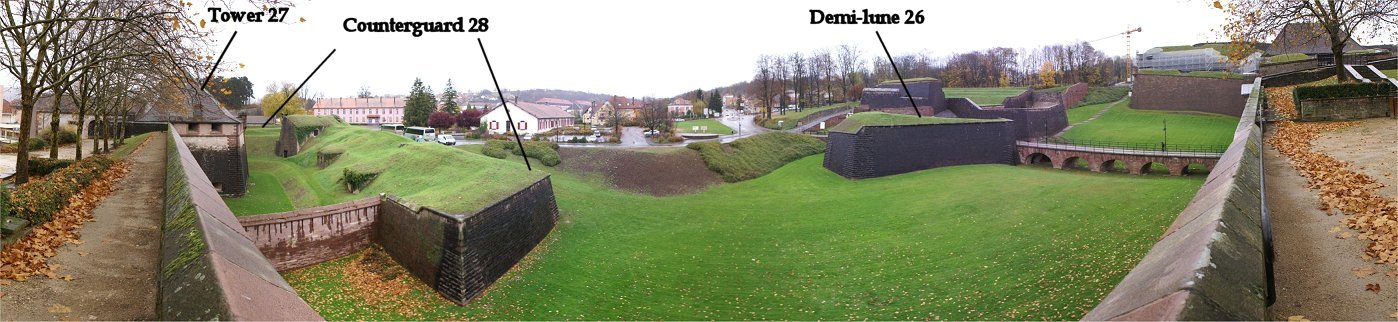
With the distortion in this
180 degree view from the curtain wall, the wallwalk on the left and right are one and the
same. The demi-lune is visible right-center.
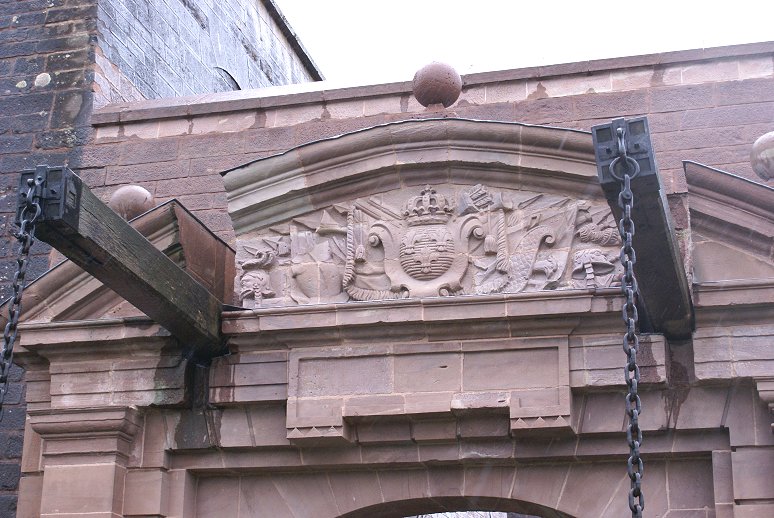
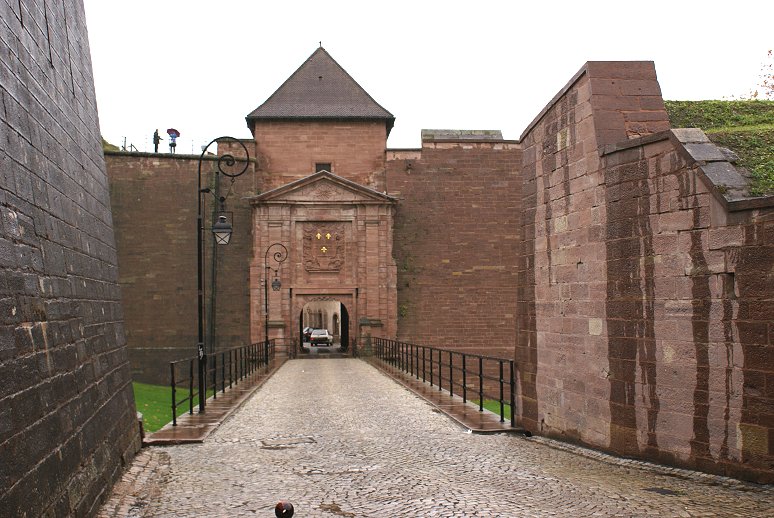
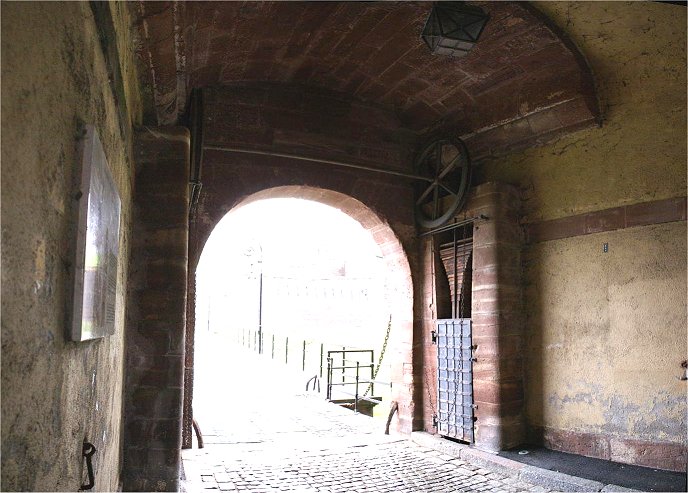
At left is the entrance through the demi-lune. At right is the
gate through the curtain wall. Below is the drawbridge mechanism
with counterweights for the gate through the curtain wall.
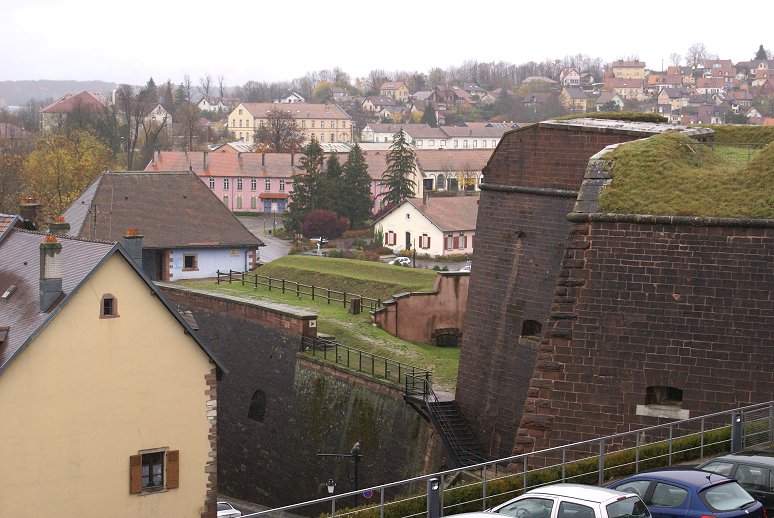
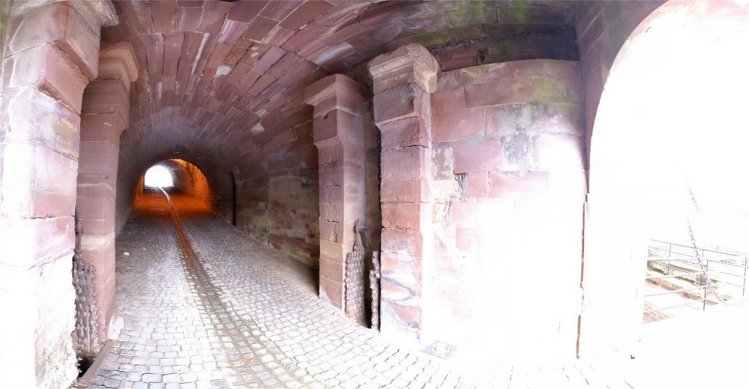
Now we are walking up to the citadel and looking back at the town side
of the walls. The white building on the left is atop the
Brisach Gate. At right are some of the tiered defenses
where the fortifications climb the hill to the citadel.
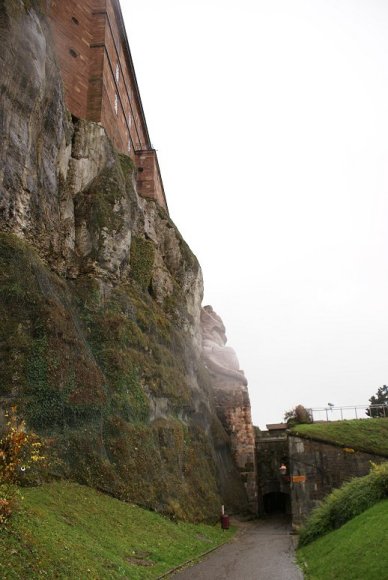
The citadel sits atop near vertical cliffs on the town side.

Is this the view from where the city walls meet up with the citadel, at right. Now, we will continue
through the opening at right.
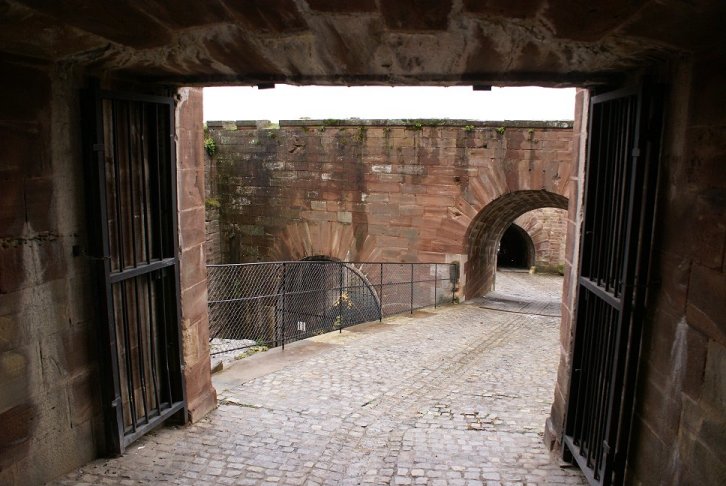
The citadel was especially strongly protected as it was
designed to hold out even if the city fell to the enemy. The
citadel also had the politcal purpose of helping to control the
populace. We will now head to the citadel!
This is the wall overlooking the city.
This is the view from atop the citadel. The entrance here is
convoluted, as you can see - on purpose. Now, we will see the
area off the picture to the right, where Vauban built a hornwork and
Haxo made extensive modifications in the 1800s. But first, let's
see the model of Vauban's design.
At right is the lower area that we have already seen. Vauban's
hornwork protecting the citadel can be seen at left. Note the
traverses not only on the covered way but also within the hornwork and
also in the demi-lune to its front.
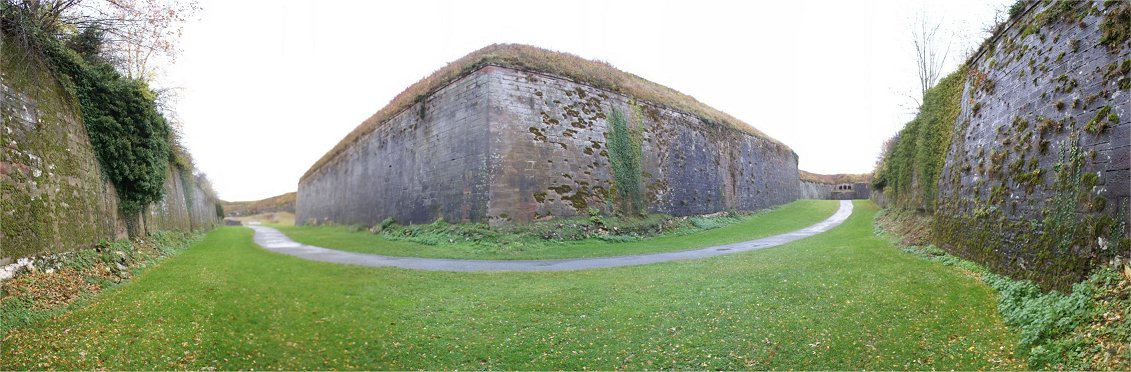
This is the view from the other side. From here, the slope of the
hill is obvious, requiring the unusual series of traverses on the
sloping section covered way. The 'horns' of the hornwork
and the demi-lune in front of it would be retained by Haxo, but the
rest
would be radically changed.
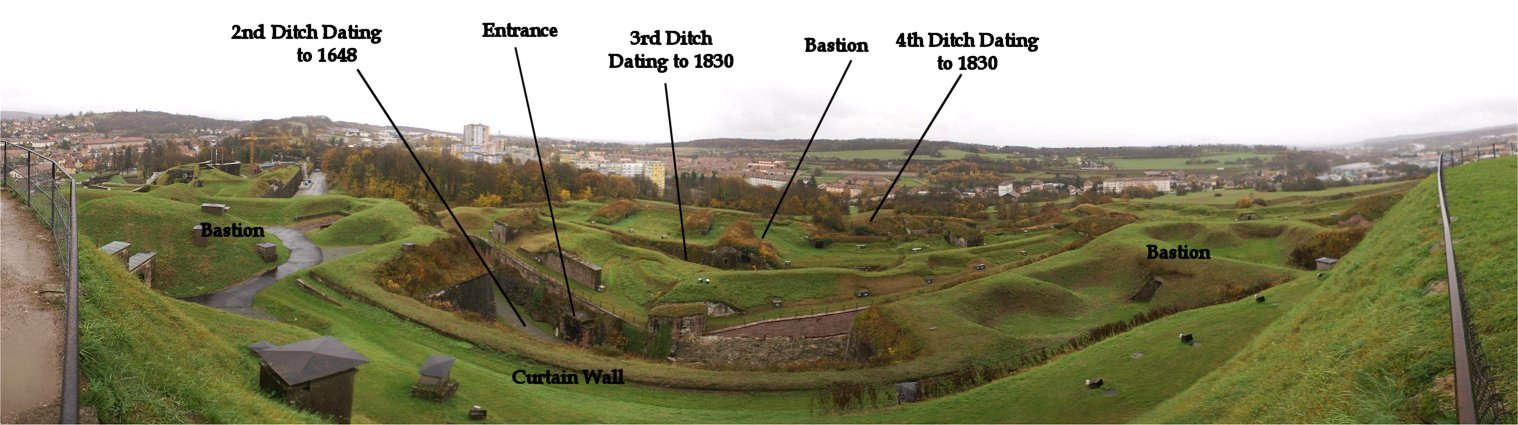
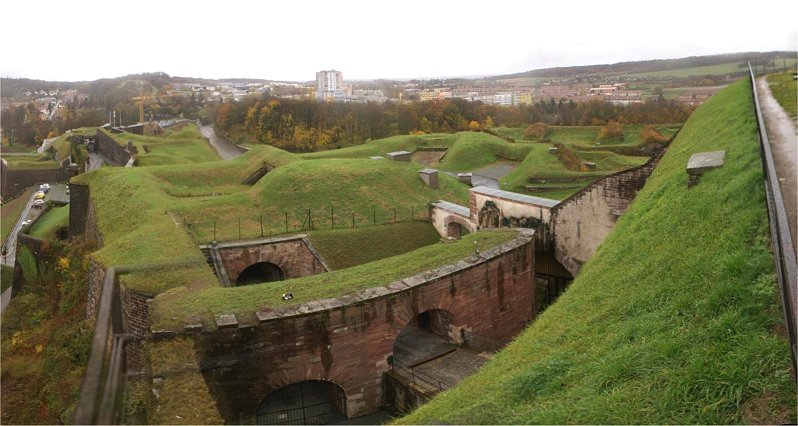
Complex? Yes, it is, but even more so for an attacker! Just off either side of the panorama are the
bluffs descending into the old part of town. The area shown here is Haxo's
modification of Vauban's design. The two bastions and curtain
wall are from the citadel and pre-date Vauban. Vauban added a
hornwork in front of these works. Haxo cut two additional moats
through the hornwork to add depth to the defense. Next, we
will go down into the outer portion
of Haxo's area.

We have walked through the exit visible at center and past the Sherman tank. Now we will walk down the trail at left.
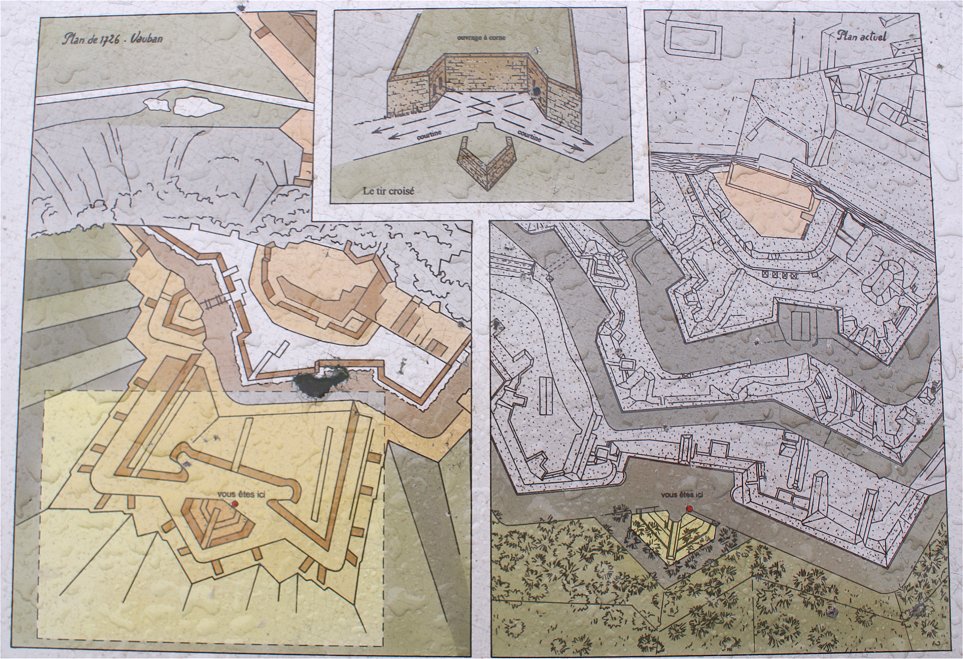
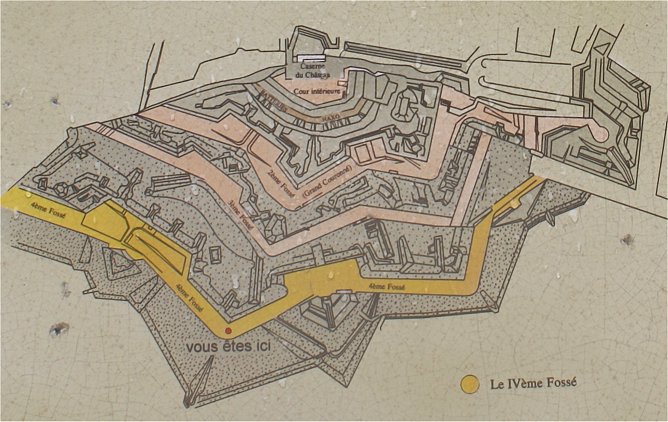
This sign shows Vauban's hornwork and the later modifications.
The red dot on the map is the location of this sign, which you
can see in the center of the panorama below.
Panorama format may make this more confusing than it it. The
walls at far left and far right and the same wall, which passes behind
you. The wall and bastions projecting from it at left and right
are Vauban's hornwork.
These bastions feature curved corners, called orillons, which
form recessed areas. This recessed area has been modified with an
additional wall with firing slits to provide a
crossfire through the ditch. Across this ditch is a demi-lune.
This is the feature in the center with ramps. The demi-lune
includes a traverse through its center line.
This is further down the trail at the tip of the hornwork, at the red
dot on the map below. At right you can see the area that we just
came from and the modified recessed area of the hornwork's bastion.
Now we will continue down the trail at left. This area was
left unfortified by Vauban. In fact, the change in stone
work in the center of the photo is the likely transition point.

This is the view from the forward edge of the defenses, on the glacis, looking back across
Haxo's works to the citadel. Bluffs are on the left. A
small demi-lune is at right center, but the impressive depth of the defenses is
not obvious from here.
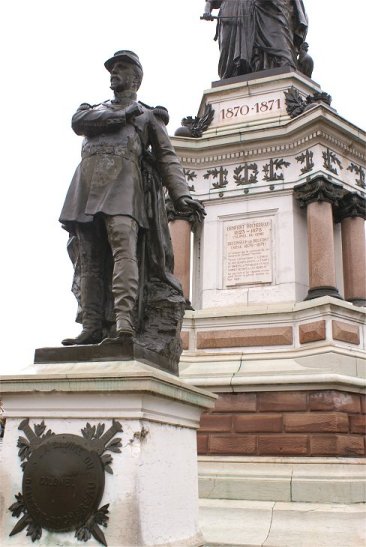
Belfort was besieged on thee different occasions.
Copyright 2010 by John Hamill