Verdun - Fort Douaumont


After defeat in the Franco-Prussian War, France faced the task of fortifying a new frontier, protecting against German advance from territories that until recently were French.  Verdun would become an important fortress town protected by a new system of fortification.  With advances in artillery technology, a series 
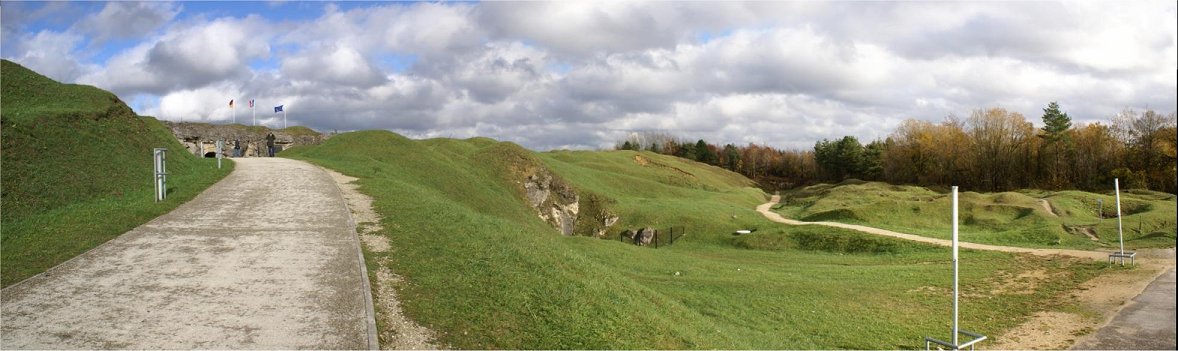
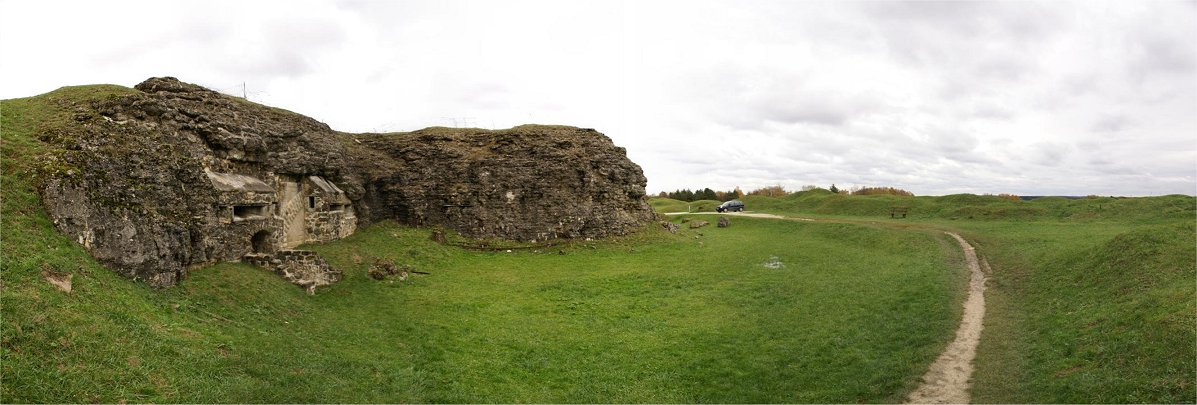
forts in two lines were constructed well outside Verdun on a ridge that had been used by besiegers during the 1870 war.  Although they 
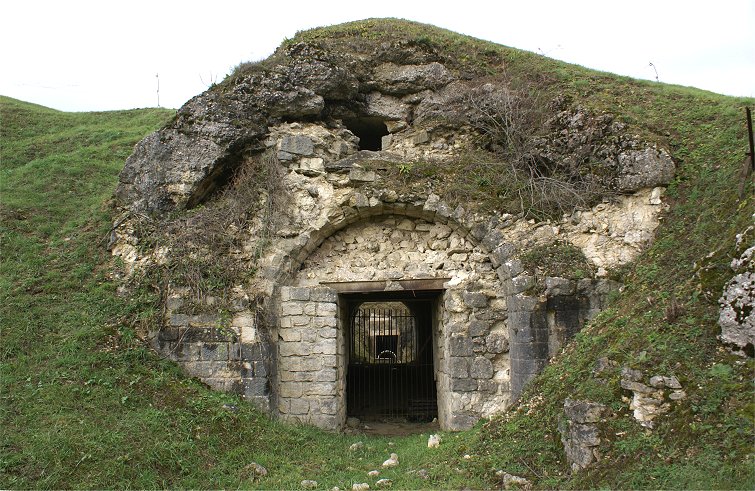
originally included exposed artillery pieces as part of relatively 
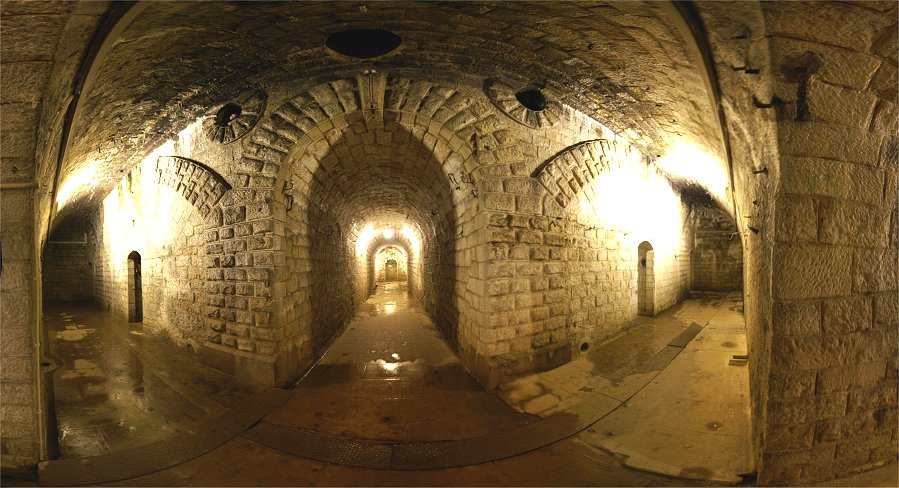
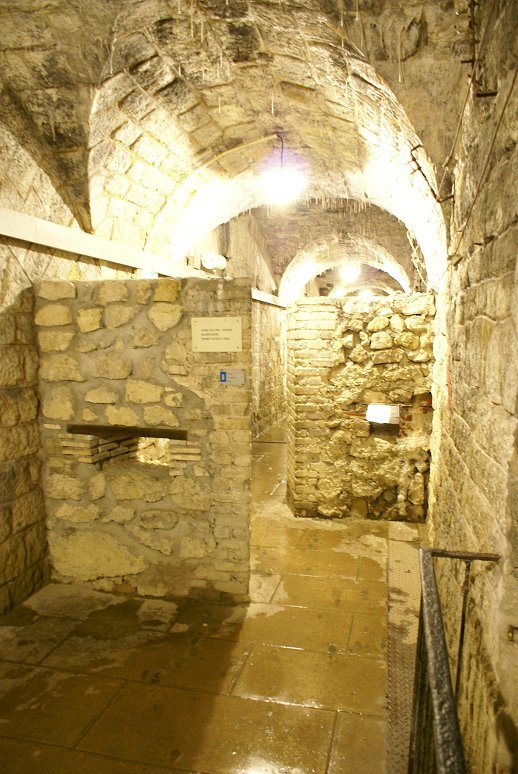
traditional designs, the forts also featured significant underground features.  Over time, the forts were modified to deal with 
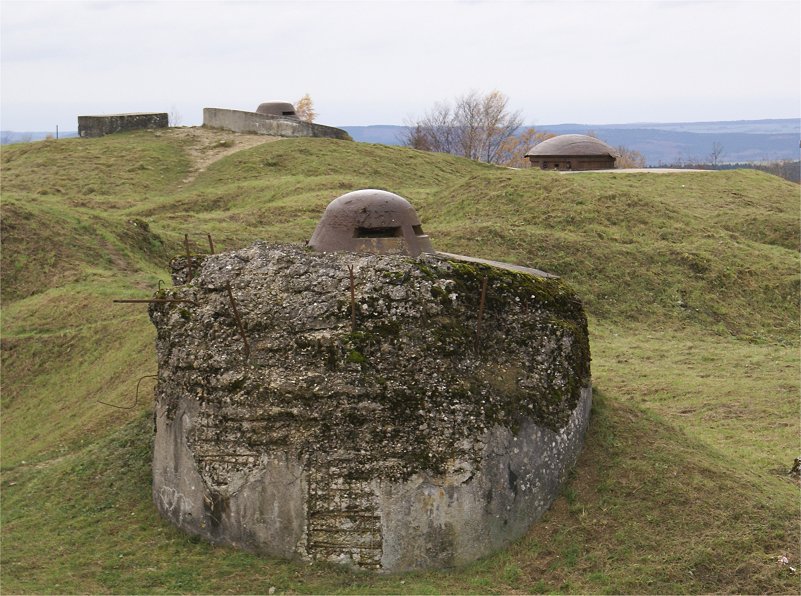
improving technology.  In 1885, improved explosives technology forced a 
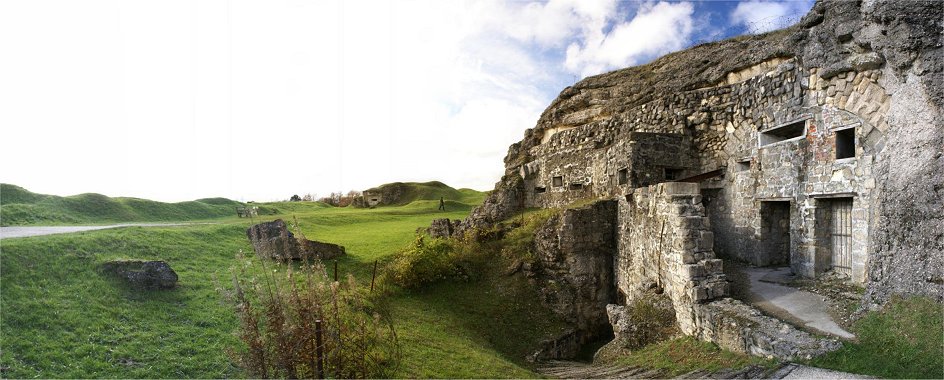
re-design.  The masonry surfaces, for example, were capped with concrete, even ones covered with earth were dug up and 
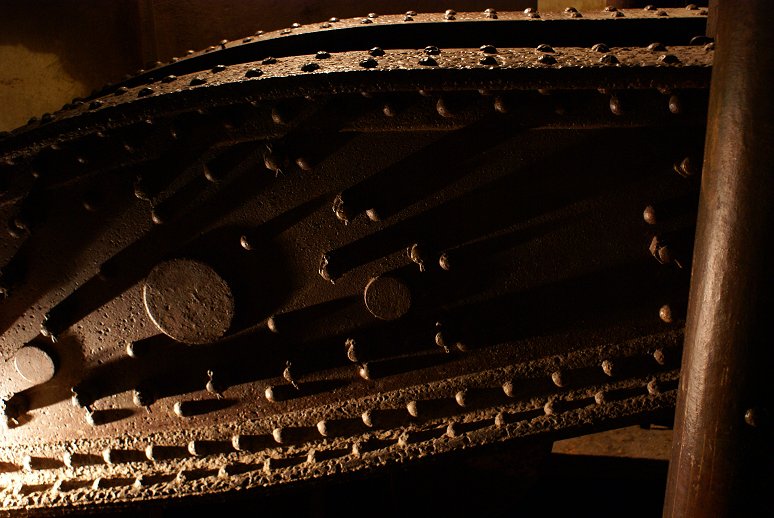
capped.  Reinforced concrete whereby steel cement was poured around steel bars, was also used in some locations.  Outward facing 
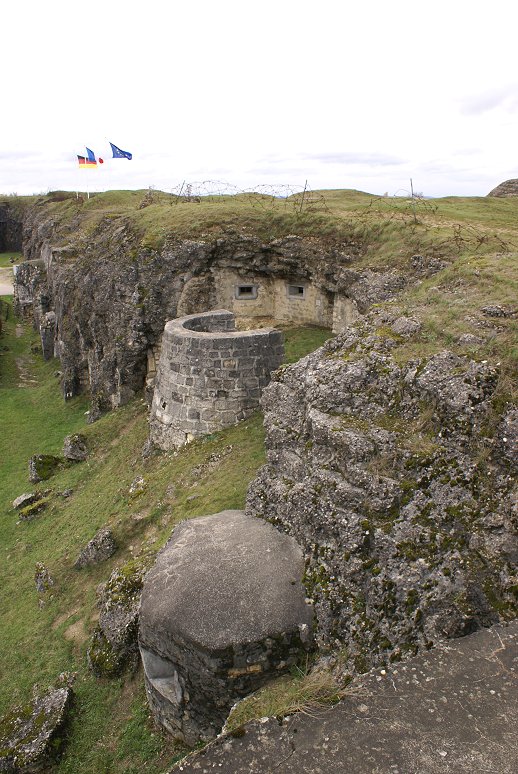
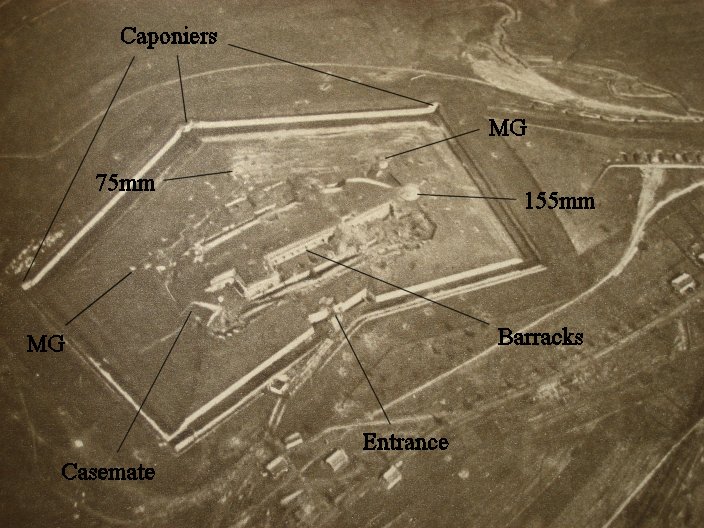
caponiers projecting from the corners of the fort were modified into inward facing casemates on the counterscarp designed to enfilade the ditch.  Additional works were built between the forts, including artillery emplacements.  The improved explosives technology also lead to a re-thinking of the armament of the forts.  
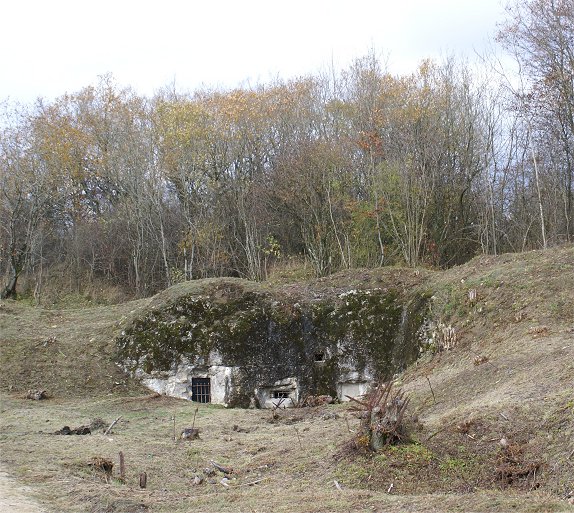
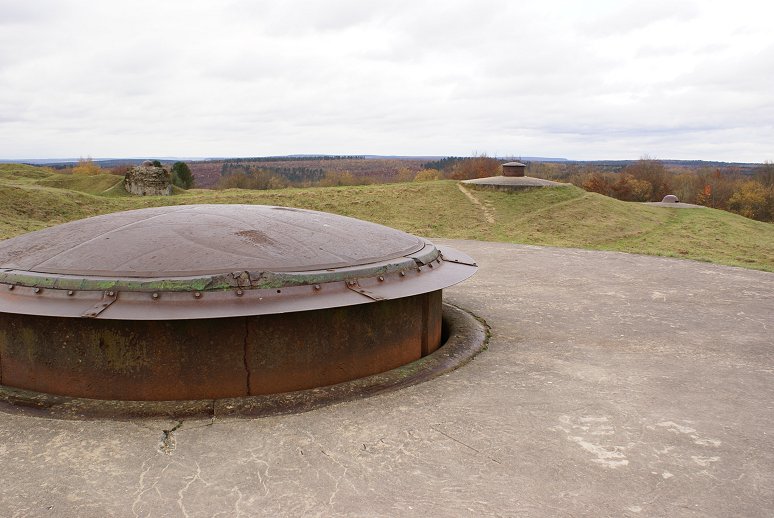
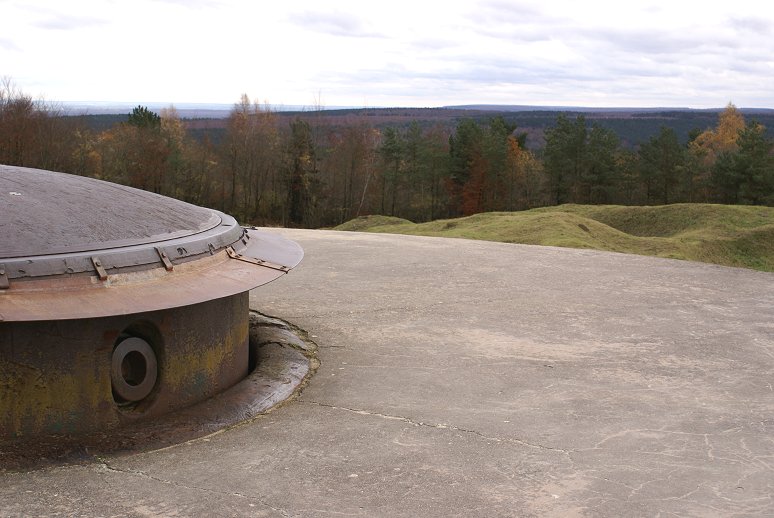
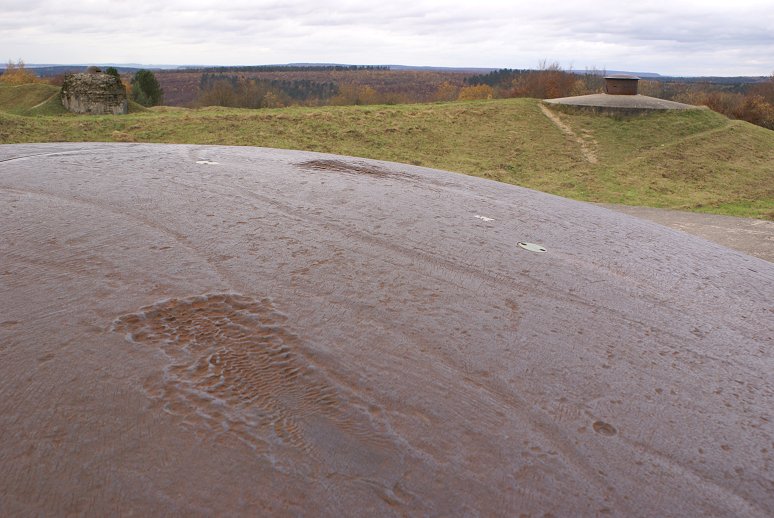
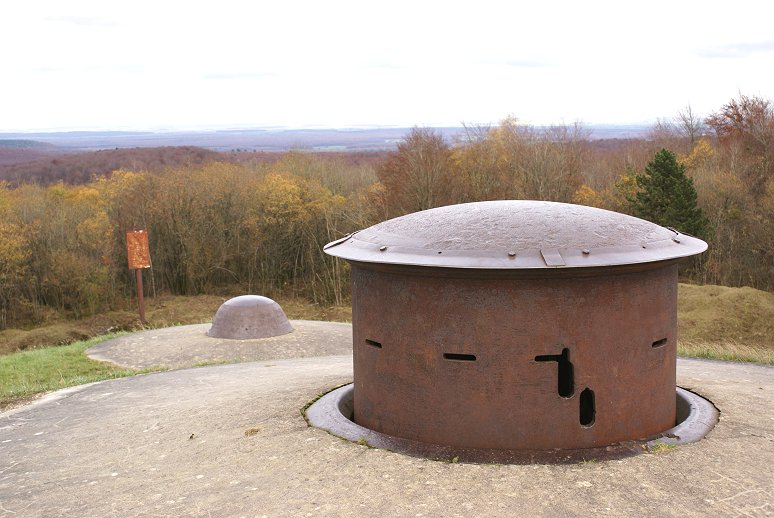
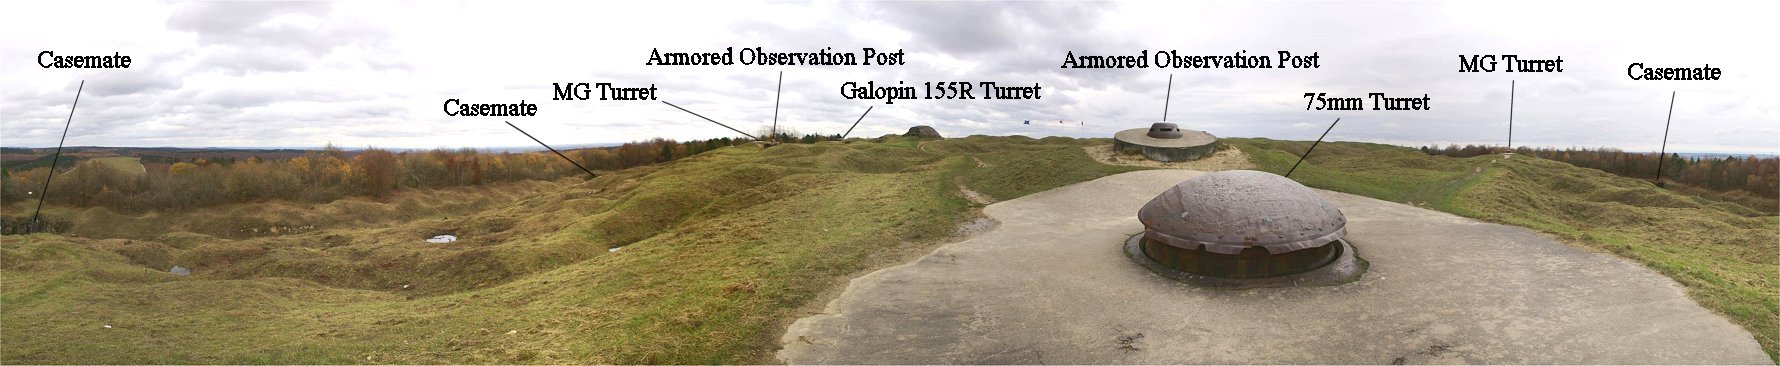
The exposed artillery on the ramparts of the forts were removed and 
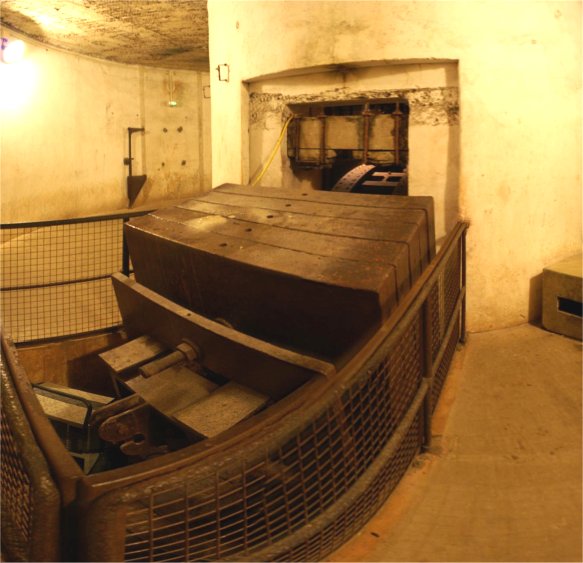
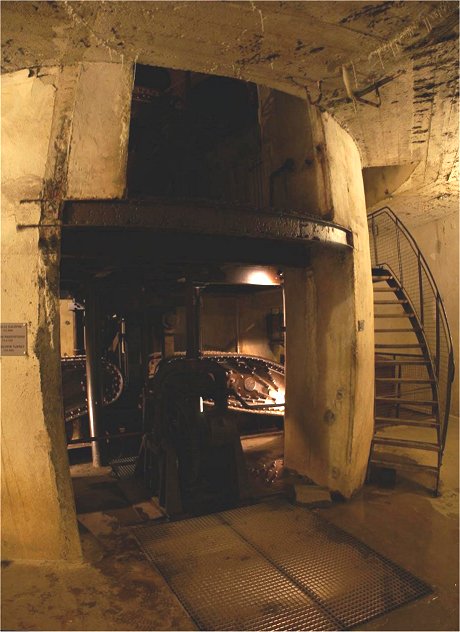
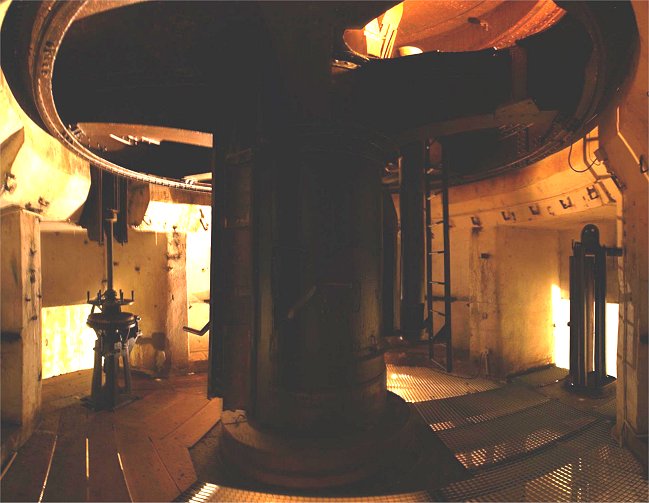
replaced by turrets for 75mm and 155mm weapons along with
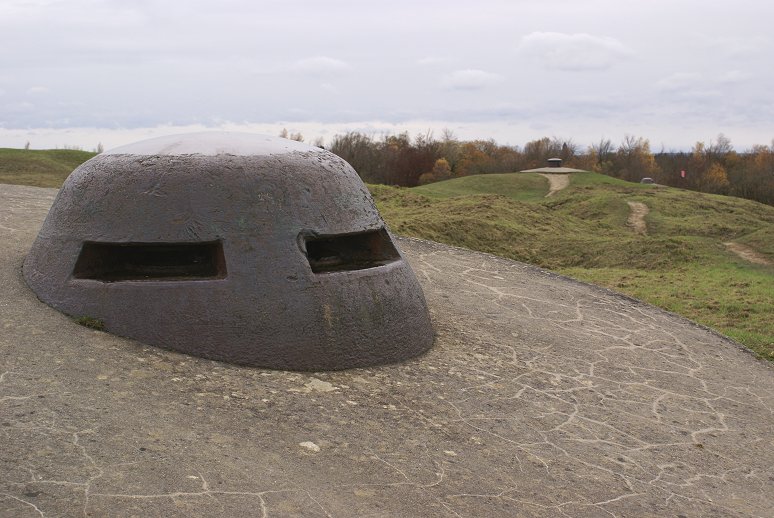
 armored observation positions.  A casemate near the barracks and armored machine gun positions were also added.  New positions for artillery were made separate from the forts themselves.

German success early in the war against the permanent fortifications of Belgium and northern France made the French high command skeptical of the value of the forts around Verdun.  As a result, they stripped guns from the forts and artillery batteries and slashed the number of defenders - all to strengthen the mobile armies.  Although this seemed reasonable at the time, history would show this to be a major mistake.  Although the fort was designed to be manned by about 800 men, during the German attack, only 57 Frenchmen defended the fort.  A small German unit of pioneers, sometimes said to have been seeking shelter from their own artillery, entered the fort and captured the garrison.

The French lost many thousands of men recapturing the fort, which they did on October 24, 1916.

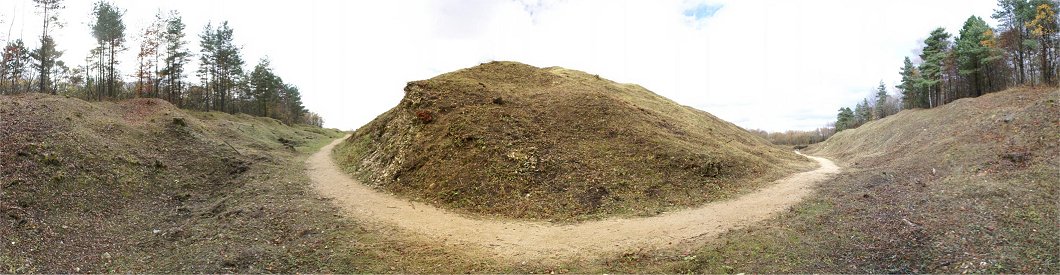
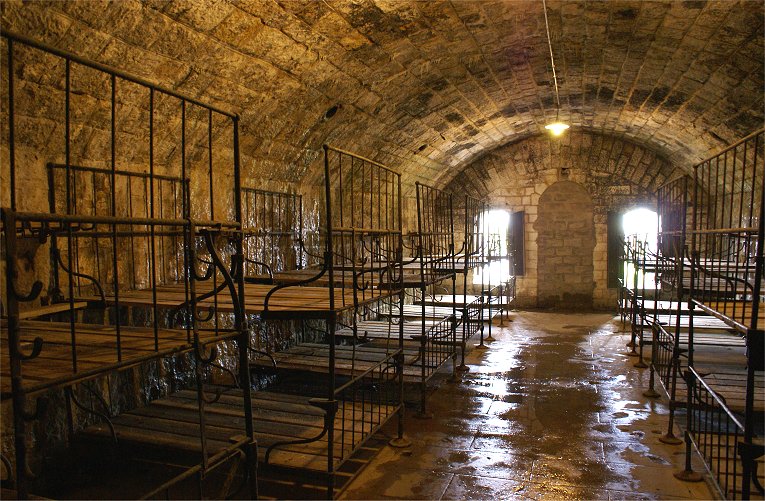
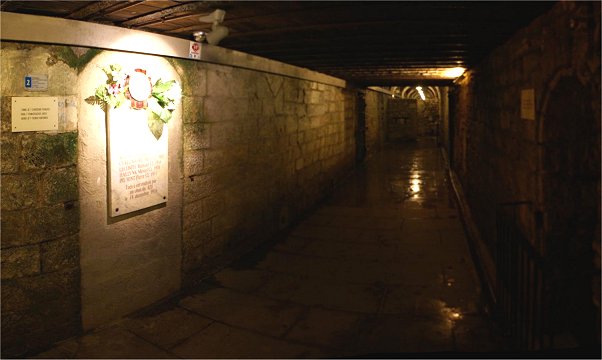
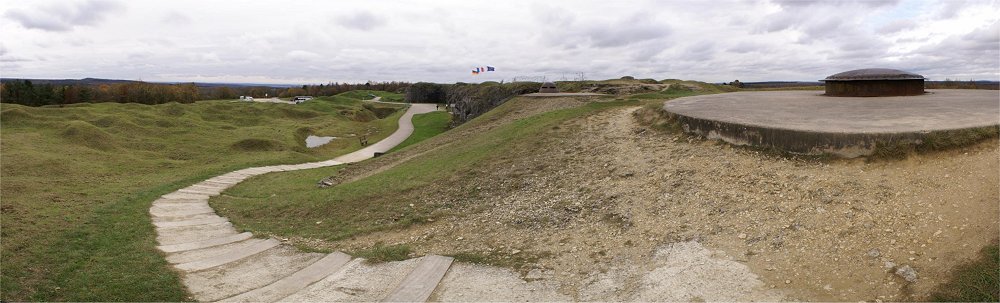
At times, over 3,000 men stayed in the fort.  The fort is around 400 meters long and covers three hectares.


Above is the view from the rear of Fort Douaumont.  Beyond the fenced off old entrance (photo at right) you can see the barracks area, made of masonry and concrete.  The Shell holes are a common site at the fort.  Next, we will walk along the trail on the right of the panorama through the ditch and around the fort.


This is the southeast corner of the fort, a 90 degree angle.  Further from the enemy, this corner does not feature a casemate.  As originally designed the scarp and 5 meter high counterscarp were on either side of the ditch.  Later modifications removed the scarp and replaced it with an iron fence topped by spikes.  During the battle, artillery fire has destroyed nearly all remains of the counterscarp.


This is the northeast corner.  The casemate is visible on the far left.  Its fire commanded the ditch in both directions.  The casemate was connected to the rest of the fort via underground passageways.  In the ditch you can see the remains of infantry obstacles.  The photo below at left shows the remains of the iron fence that replaced the scarp.  Before the battle, barbed wire was a feature of the fort strung in the open ground beyond the ditch.


This is the northern tip of the fort.  Its casemate is prominent on the left, but if you have good eyes, you can make out the casemates at the end of the ditch at left and at right.  On the slope at left, you can make out some masonry - likely among the only remains of the counterscarp.


Having walked the ditch, we will now walk up the tourist entrance toward the barracks.


The French had already modified the original fort design, adding concrete over masonry.  When the Germans captured the fort, they modified the barracks in the rear to create protected small arms firing ports.


Western Side of Barracks


Eastern Side of Barracks


These are barracks casemates.  The one at right has been modified into a fighting position.


A narrow gauge railroad connected the forts, allowing for their resupply.


This 180 degree view shows the interior masonry work.  Although much of the fort's interior can be visited, some sections are unstable from the massive bombardment the place was subjected to.


A German 420mm round made a direct hit on a casemate on December 16, 1916.  All 21 Frenchmen inside were killed as the casemate collapsed.  Seven bodies were not recovered and still lie behind the walled off entrance on the left of the panorama.


German Cemetery

The Germans occupying the fort endured an incredible disaster on May 8, 1916 when an accidental explosion in a grenade depot started a fire in the flame thrower depot.  Something between 800 and 900 men were killed.  Of those, 679 are buried behind this cross.  Around 1,800 were injured in the incident.


The fort was not originally designed to deal with an enemy that had entered the fort's interior.  Modifications like these made defending the interior easier.


Ladder to a lower level.  Stair were available elsewhere.


Galopin 155R Turret

Two counterweights, each 45 tons, were used to ease the raising and lowering of the turret.  Between 20 and 22 men operated the turret, which featured a 155mm short barreled gun.  Although the gun could be fired quickly in theory, in reality, fumes and noise substantially reduced the rate of fire.


Galopin 155R Turret

At left is the lowest level.  If  you climb the steps at right, you have the view seen in the image at right.


Detail of Galopin 155R Turret Mechanism


Galopin 155R Turret

These are exterior views of the turret.  The photo at right shows what appears to the result of a glancing shot on the 30cm thick armor.  The turret is on the eastern side of the fort.

With this and other turrets, the armor extended into the concrete, the upper portion of which was classified as a special type with relatively little aggregate added.


The upper portion of the turret can be seen by climbing the steps on the east side of the fort.  If you continue toward the northeast corner, you will see one of the two machine gun turrets.


Machine Gun Turret and Armored Observation Post

The prominent turret here held two Hotchkiss 8mm machine guns, fired through the oval apertures.  Two guns were installed so that one might cool while the other could be used.  The turret could turn 360 degrees powered by the gunner's legs and be retracted manually with the help of a counterweight.  The horizontal slits are for viewing.  The stationary, bell shaped steel position was an observation post 20cm thick.  Reached by ladder, the observation post could communicate with the nearby turret by acoustic tube.


Machine Gun Turret


Armored Observation Post

The Germans subjected the fort to fire from 420mm weapons, the massive 'Big Berthas' successfully used against the Belgian forts.  Later, the French used their 400mm weapons against the fort.  Incredible amounts of earth were blown off the top of the fort, as can be seen here, in this case exposing the reinforced concrete cylinder that an armored observation post rests on.  An occasional lucky shot took out an underground casemate, as we have seen, and some of the tunnels sustained enough damage during the bombardment that they are not considered strong enough to allow tourists to visit them.  Nevertheless, the fort held up remarkably well and inspired the French to build the Maginot Line based on the lessons learned.  


This panorama is from the eastern side of the fort.  The casemates on either side enfilade the ditch.  The 75mm gun turret is near the northern tip of the fort.  Between there and the prominent machine gun turret, German 420mm artillery shells have removed much of the top of the fort.


This view toward the center of the fort better shows the massive damage to the top of the fort.  


75mm Turret

Near the northern tip of the fort is the 75mm gun turret along with the nearby armored observation post.  The turret held two short barreled 75mm guns and could be rotated 260 degrees and raised or lowered by hand cranks.  Like the 155mm turret, the 75mm turret's top was 30cm thick.  

On February 25, 1916, a heavy German bombardment drove the small number of French defenders away from their positions.  A small group of 10 German pioneers made their way into the ditch.  French troops in the nearby town of Douaumont believed them to be a returning French patrol and did not fire on them.  Sgt Kunze made his way into the northeast casemate.  (I believe the second from the left in the panorama.)  Fearful of an ambush, his men followed only later.  Then another group under a lieutenant entered the fort.  (I believe the casemate at left.)  The two groups advanced underground through the tunnels, taking the garrison prisoner.  The only casualty was a scraped knee.  What was considered the strongest fort in the world had been captured by a small group of Germans in an amazing feat.


June 1, 1916 Trench Map From George C. Marshall Library


Copyright 2010-11 by John Hamill


Back to Verdun