Fort Eben Emael

May 10, 1940


An ally of France after the First World War, Belgium declared its neutrality in 1936.  In the 1920s and 30s Belgium built a series of forts along its eastern border.  A fort had been recommended at Eben Emael as early as the late 1800s, and with the building of the 
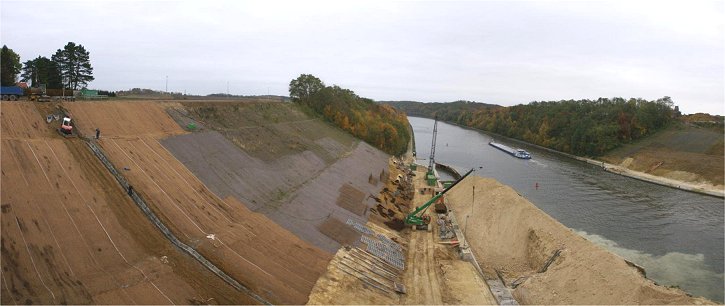
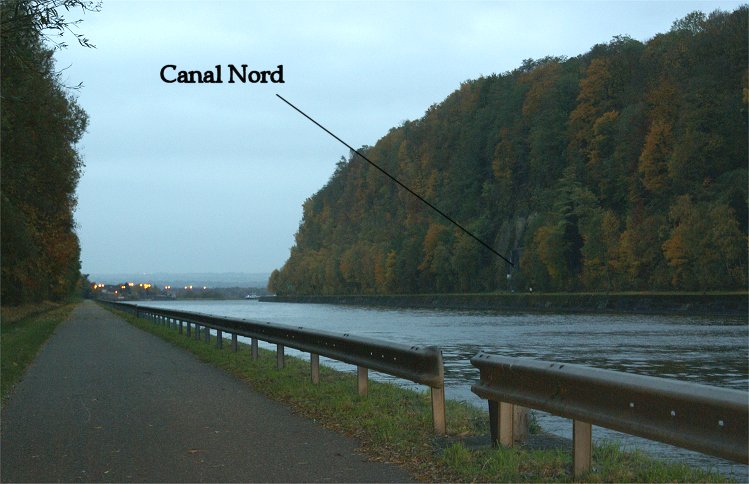
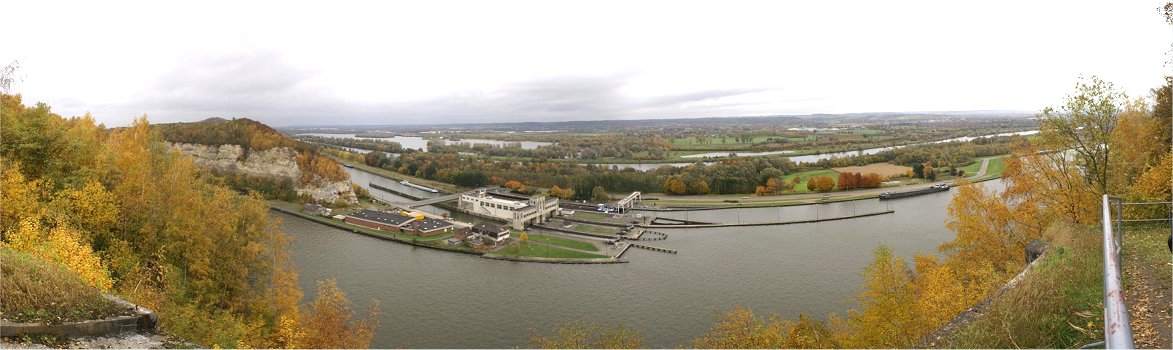
Albert Canal to bypass the portion of the Meuse River in the Netherlands, an additional barrier was available.  The fort at 
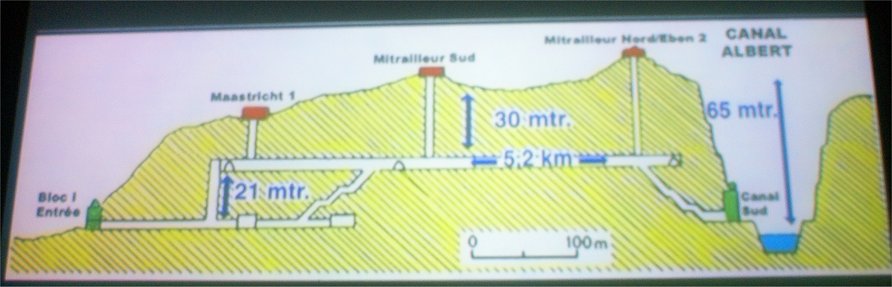
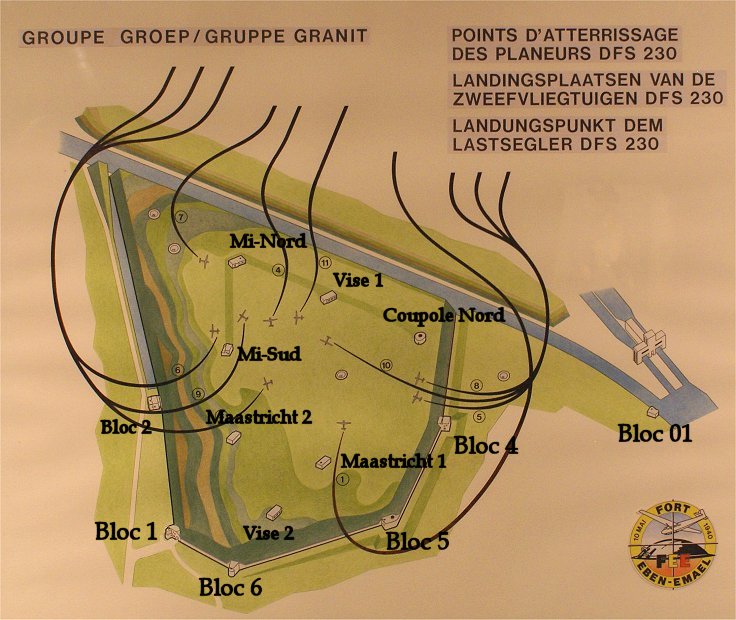
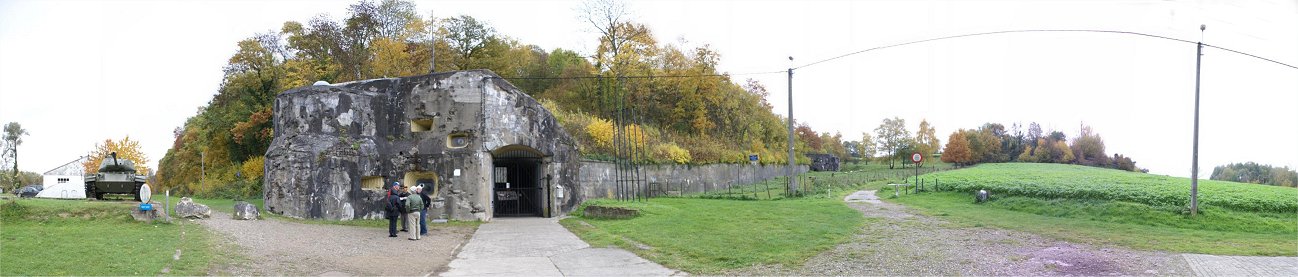
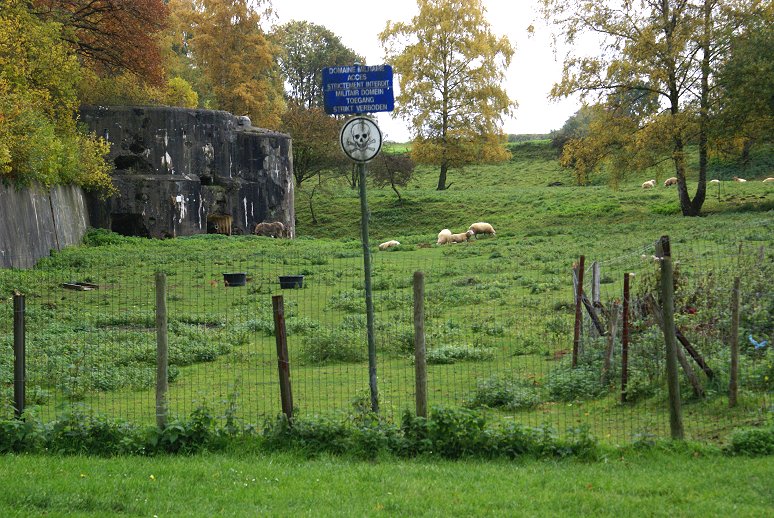
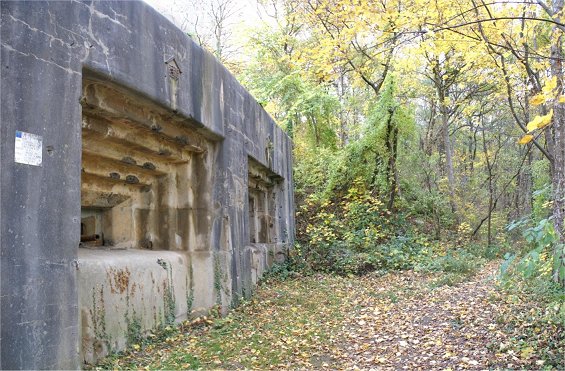
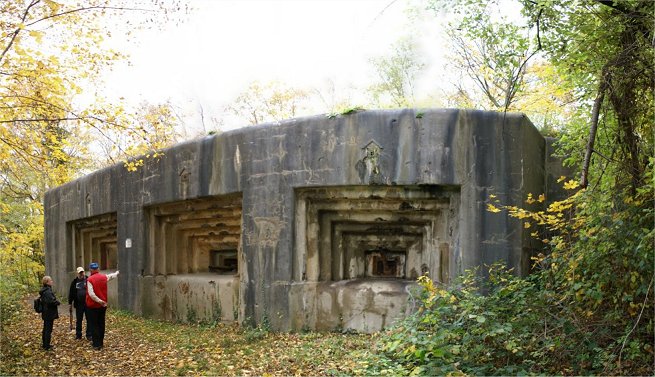
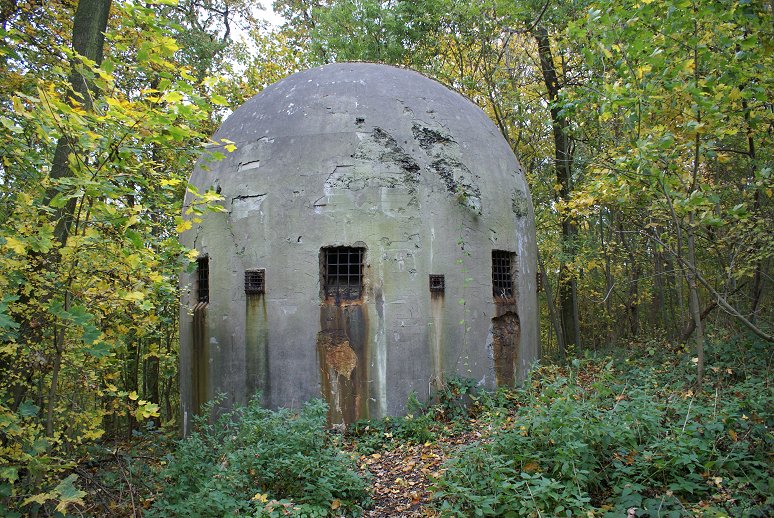
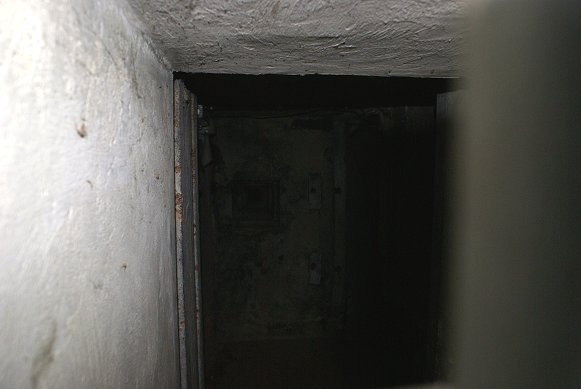
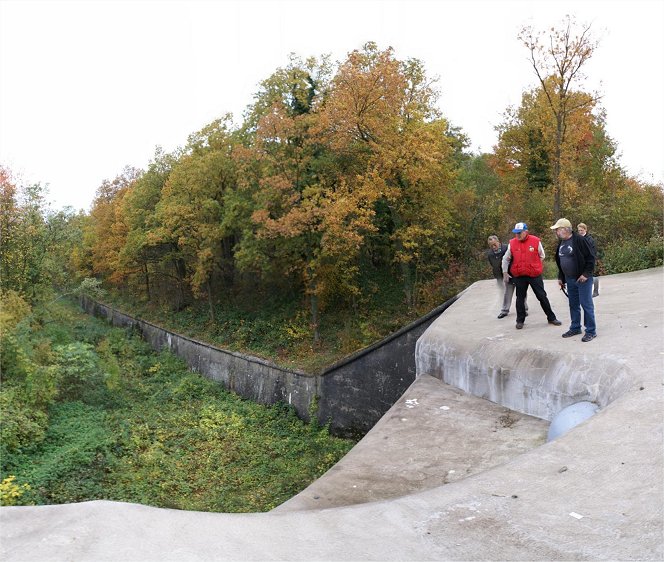
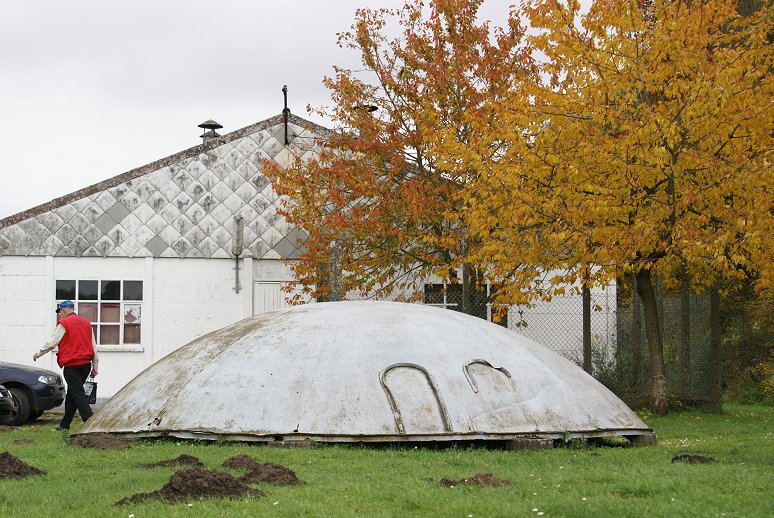
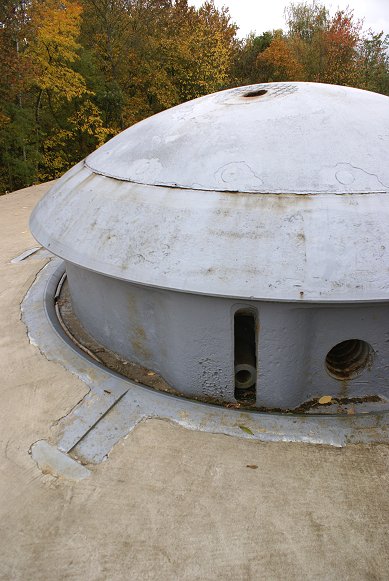
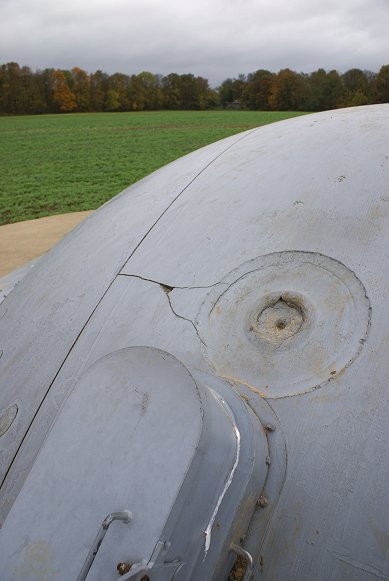
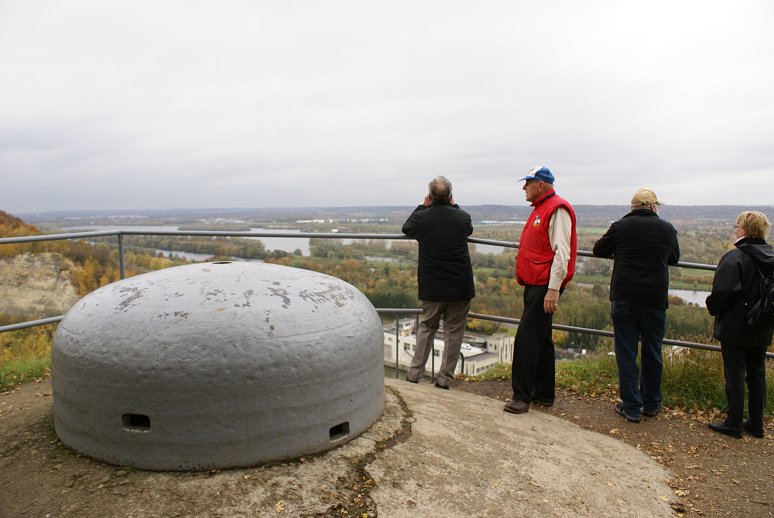
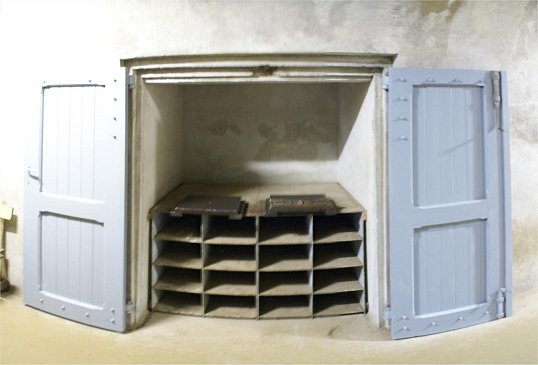
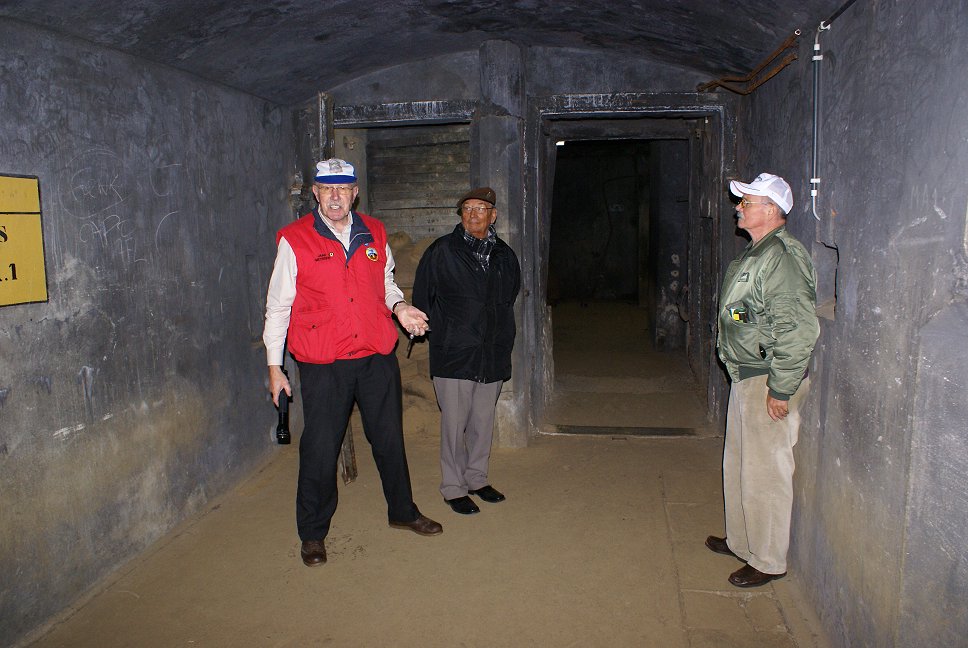
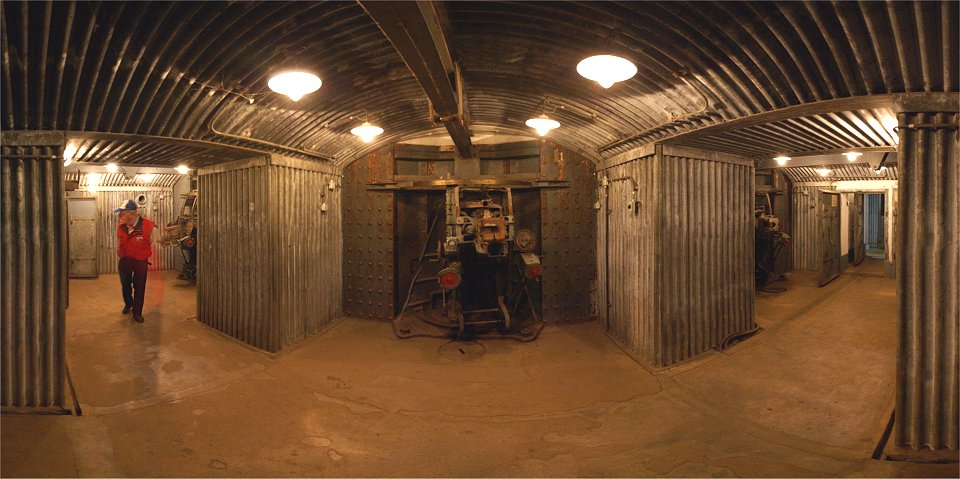
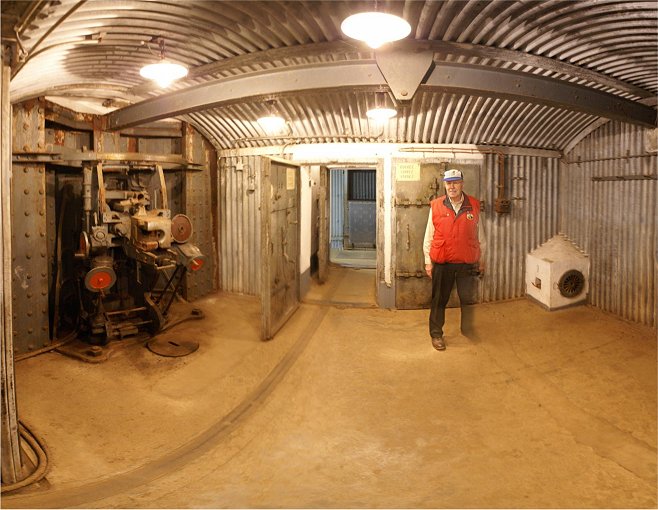
Eben Emael was built atop the cut where the Albert Canal passes through a 
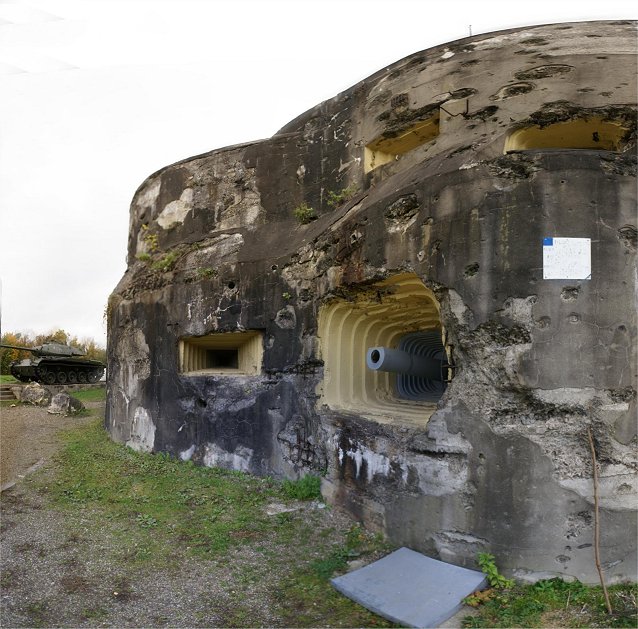
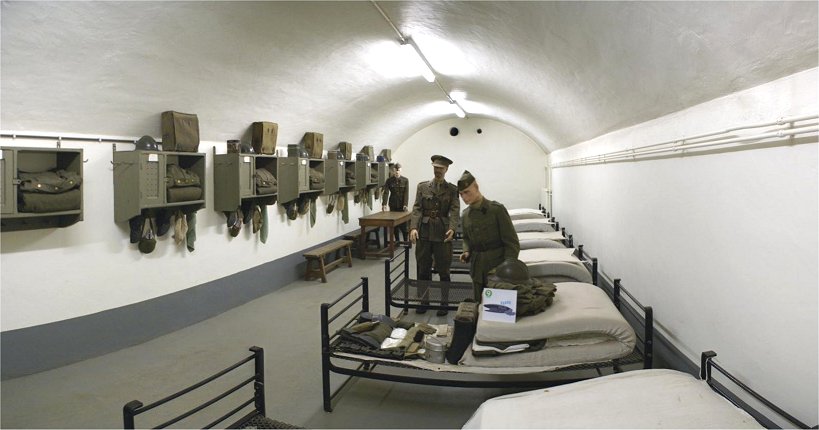
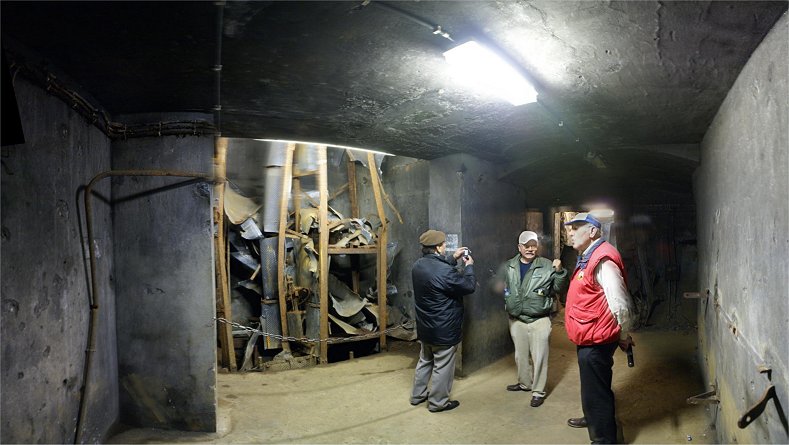
large hill, Mount St. Peter.  Eben Emael was the strongest of a system of forts built to cover all crossings of the Meuse with artillery.  It was, in fact, considered to be the strongest fort in the world.  If the Germans attempted to invade Belgium again, they would have to deal with the fort.

Hitler's invasion of Poland in September 1939 forced France and Britain to declare war on Germany.  German plans for the conquest of France in the fall of 1939 were delayed until the winter, then a German officer's plane crashed in Belgium, possibly revealing the German plan, including the violation of Belgian neutrality.  For the Germans, this was unexpectedly 
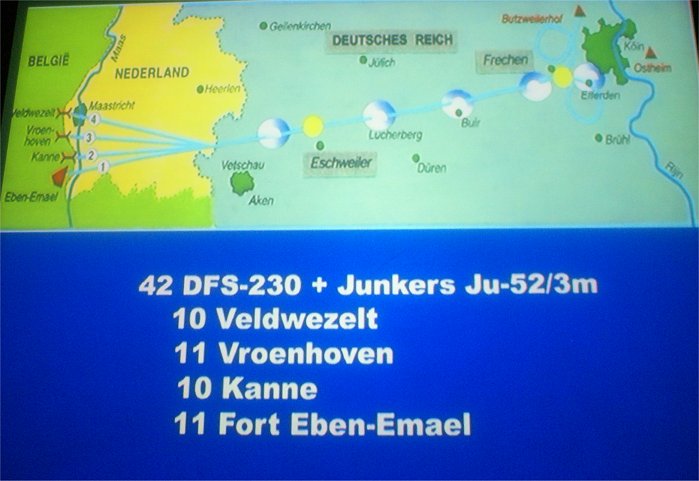
fortuitous, as it forced a change of plan.  To deal with Fort Eben Emael, Hitler asked Kurt Student, commander of the Luftwaffe's 7th 
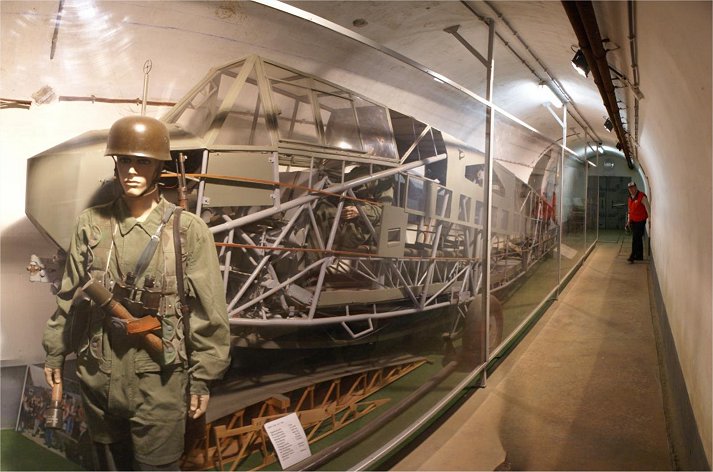
Flieger Division, the first airborne division in the world, if glider troops could be landed on the fort.  Yes, they could, but how 
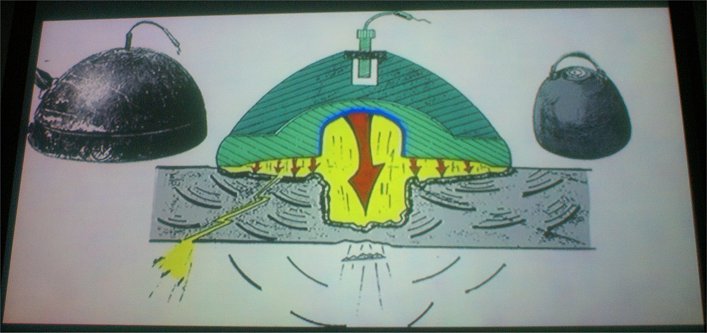
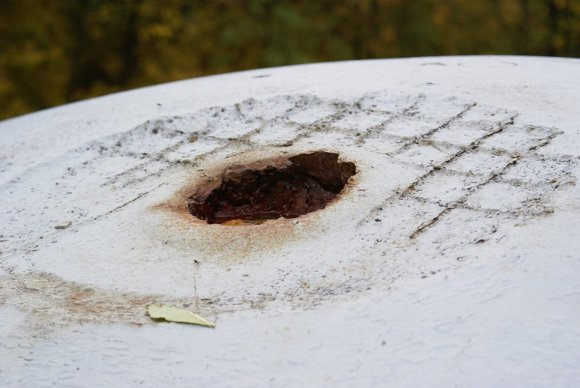
could they capture the fort?  For this, Hitler had a secret weapon, the shaped charge.


Shaped Charge

By creating a hollow section in the explosive, the blast would form a jet of flame which would penetrate armor much more effectively than a standard explosive.  Late in the war this technology would become common  on weapons like the bazooka and the panzerfaust. 


Taking off in the early morning hours of  May 10th, Junkers Ju-52s took off towing 42 DFS-230 gliders with 438 soldiers and glider pilots.  In addition to the fort at Eben Emael, the bridges at Kanne, Vroenhoven, and Veldwezelt were targeted.  If the bridges could be captured before the Belgian army blew them up, and if the fort at Eben Emael could be captured, the German army could stream into Belgium.


DFS 230 Glider

Eleven gliders with a total of 84 soldiers were assigned to the attack of Fort Eben Emael.  This was Sturmgruppe Granit.  Two gliders had tow rope problems resulting in one group landing prematurely and eventually fighting near Kanne while the other group, which included the commander Oberleutnant Rudolph Witzig, landed in Germany and got another plane to tow them.  They would arrive late.


Maastricht

The bridges at Maastricht in the Netherlands were demolished before a special Abwehr unit could capture them.  Fortunately for the Germans, a railway bridge at nearby Maaseik was captured intact.


Vroenhoven Bridge Site

With demolition charges in places, all the Belgians needed to blow the bridge at Vroenhoven was authorization from area headquarters.  Sturmgruppe Beton, 134 soldiers, landed at 4:15 capturing the bridge and cutting the wires to the explosives just in time.  Belgian counterattacks and artillery fire failed to destroy the bridge.  The glider men were relieved that night having lost 7 killed and 24 wounded to Belgian losses of 147 killed and roughly 300 captured.

With the capture of the bridge here and the one at Veldwezelt, the Germans were able to cross the canal and advance into Belgium.  The attack on the bridge further south at Kanne near Eben Emael, however, would not be successful.


Kanne

The gliders here at Kanne were unable to land as close to the bridge.  Maj Jottrand at Eben Emael witnessed the landings and order the bridge to be blown.  Fighting continued here into the night, when the glider men crossed to the east side of the river to join German troops coming to their relief.  The glider men had lost half their number.


Kanne

At right is the new suspension bridge at Kanne.  At left on the hill overlooking the canal cut is Fort Eben Emael.  Although two of the three bridges had been captured, if Fort Eben Emael was not neutralized, the bridges would not be safe for crossing.  The bridge defenses had included bunkers, but these bunkers were nowhere near as formidable as the fort.


Canal Nord

Two of Fort Eben Emael's positions, Canal Sud and Canal Nord, covered any potential crossing of the canal in this vicinity.  The vertical cliffs, around 65 meters high, would face any enemy that managed to cross the canal here.  Toward the end of the fight, the Germans tried to neutralize this position, with no success, by lowering explosives down the cliff with a rope.


The western face of the fort sloped down to a creek and the town of  Kanne.  A wet ditch extended from the canal to Bloc 2.  Bloc 1 was the entrance.  On the other side of Bloc 1 was a wall, which extended to  Bloc 6.  Beyond Bloc 6 was an anti-tank ditch which extended past Blocs 4 and 5 to the cliffs overlooking the canal.  These were formidable defenses, but the glider troops who were to circumvent these defenses and land on top also faced strong defenses, machine guns positions, and anti-aircraft position, and artillery casemates armed with guns capable of using the 20th century version of canister shot.     


Bloc 1

Now the tourist entrance, Bloc 1 is still formidable, with an anti-tank gun and machine gun positions.  You can see the wall extending from Bloc 1 to Bloc 6.  To the left of Bloc 1 administrative buildings stood.  Receiving a warning of war with Germany, the fort commander, Maj. Jottrand, followed orders to immediately destroy the administrative buildings.  Unfortunately, the fort was already understaffed with 989 men, and to accomplish the demolition in a timely manner, men had to be taken away from their fighting positions on top of the fort.  This would be the fort's undoing.

As the action unfolded atop the fort that morning, sorties were made from Bloc 1, but they were repulsed.


Bloc 1 Gate

Any German that survived the barbed wire, machine guns, and anti-tank guns and entered the gate at Bloc 1 would face a removable wooden bridge over a ditch, a grenade drop slot, and a machine gun lined up to fire along the corridor.


Bloc 6


Vise 2

If you walk the trail from Bloc 1 to the top of the fort, you will first come upon this gun position along the western facing slope.  Vise 2 is one of two gun batteries facing the town of Vise to the south, where there is a crossing of the Meuse and the canal.  Because the Germans were crossing north of the fort, this gun position was a low priority.  At the time of the battle, none of the fort was wooded.  Further down, you can see the interior of this position.


Ventilation Shaft

During the attack, the Germans dropped a 3kg charge down the ventilation shaft.  Fortunately for the Belgians, this was the only such attack.


Continuing along the trail you come upon this clearing with the fort's strong points along the edge of the post-war woods.  Coupole 120 is a rotating turret with two 120mm howitzers in the middle of the fort.  You can see that the photo was taken from the low angle of the clearing with the highest area near Bloc 4.


Coupole 120

The Belgian High Command issued an alert at 10:30pm on May 9th.  News of this arrived at Fort Eben Emael at 1:00am on May 10th.  Coupole Nord was supposed to fire four blank shots to notify troops in the area of the war alert, but an order arrived to wait, so the alert rounds were only ordered at 2:30am.  Because firing pins in the 75mm guns had been removed for an exercise and never replaced, it took until 3:25am for the warning rounds to be fired, from Coupole Sud because not enough men were in Coupole Nord to fire the guns.  Why?  At 2am, Maj. Jottrand ordered the buildings outside Bloc 1 to be destroyed to create a clear field of fire.  Since the alert rounds had not yet been fired, troops had not arrived at the fort from the surrounding area so the men who manned the positions here on top of the fort were taken away from their combat positions and ordered to help destroy the buildings and remove their contents.  This would prove disastrous.

Jottrand, however, was not alarmed.  German troops would have to pass through the Netherlands and cross the Meuse River to reach Fort Eben Emael, and no one had reported that.  Presumably there was plenty of time to raze the buildings.  An airborne attack was not envisioned.  Due to the inherent dispersal involved, dropping paratroopers on the fort was impractical, and gliders had never been used in combat - until now.  Ordinarily landing on top of the fort would be a suicide mission.  This morning, however, would be different.

The prominent cupola here held two 120mm pieces, which were capable of reaching the German border.  Although the guns could reach the captured bridges, they were not functioning due to poor maintenance.  The ammunition hoists were not working.  Fortunately for the Germans, the one glider team that failed to land (their towrope broke) was assigned to destroy this emplacement.  This team included the commander of the operation, but because of their excellent training, the glider troops were able to accomplish their mission without him.  Coupole Nord, as we have seen, didn't have enough men to operate.  Coupole Sud was functional but didn't have any of canister rounds that could essentially turn the piece into a giant shotgun.  Vise 1 only had 21 of its 32 men.  Maastricht 1 just had seven men, not enough to man the guns, and the periscope was missing.  Mi-Nord had just 5 of 21 to man its four machine guns.  Because opening ammunition cases would start the process of the deterioration, the ammo was not loaded in the weapons.  Mi-Sud was protected by barbed wire, but it was not manned at all.  Previously, Jottrand had asked to put barbed wire around some of these positions, but his superiors had refused.  The anti-aircraft position near Bloc 4 had only 19 of its 27 men to man the four machine guns, and their grenades couldn't be used because they had no fuses.  

When gliders appeared 300 meters overhead they were first thought to be British recon planes, and it was only when on final approach that the Belgian anti-aircraft guns opened fire.  Even then, two of the guns jammed.  Gliders started to land at around 4:20 - nine of them with around 70 men, and one even clipped a machine gun when it landed.  The AA positions were quickly captured.  The wrong type of alert had been sounded, so the positions on top of the fort weren't properly prepared.  At any rate, at Maastricht 2 (not visible in this panorama) the ammunition hoists failed.  The German glider team subdued the position with two shaped charges and grenades, with only three of the 24 Belgians escaping unscathed.  Maastricht 1, manned by 7 to 10 Belgians was similarly subdued with just one escaping unscathed.  With these two positions taken, the captured bridges were safe, and the mission could be considered a success.

Unmanned Mi-Sud was attacked with two 12.5kg charges, which were ineffective, then by a 50kg charge which opened it up.  The Belgians in the fort sealed it off, however.  Mi-Nord was attacked with a small 1kg charge in the hole where a periscope would ordinarily be mounted.  Charges of 50kg and 12.5kg were also used, neutralizing the position.


Coupole Nord

The glider targeting Coupole Nord barely missed the fort's wall and pulled up at the last moment to land 25 meters from the target.  Seeing the threat through the periscope, the cupola crew scrambled to get canister rounds, but the ammunition hoist failed.  Two 50kg shaped charges failed to penetrate the cupola, but metal particles killed and wounded several men, forcing the crew to evacuate.  Another explosion took off the door of the infantry exit.

The Germans who had captured the AA position moved to reinforce the attack on Coupole Nord, but they were fired on from the hut in the middle of the four gun AA position.  Capturing the hut, the Germans used their prisoners as human shields as they approached Bloc 4.

Vise 1 was hit with a 12.5kg charge, which convinced the gunners to abandon the position.  Some returned to the guns but were ordered back out of the position.


Bloc 4

This block covers the ditch.  Approaching behind the cover of Belgian prisoners, the Germans used a 50kg shaped charge on the block's observation dome, neutralizing it.  Like in many other locations, the pattern of the camouflage netting was imprinted by the explosion.  When showing the fort to foreign observers after the battle, the Germans covered these areas to keep secret the shaped charge technology that they had used.


False Cupola

The men from two of the nine gliders attacked two false cupolas on the northern tip of the fort.  Finding that their targets were illusory, the Germans instead tried to destroy the Canal Nord position many meters below them.


Coupole Sud

Coupole Sud was hit with a 50kg charge on the 75mm gun turret at around 5:35am.


Coupole 120

Since the glider of German commander, Oberleutnant Rudolph Witzig, was forced to abort its mission, Coupole 120 was the last untouched objective of the attack.  (Witzig would land at 8:30 after getting another tow.)  After the glider teams had already taken care of their objectives, some glider men switched their attention to Coupole 120.  Not having 50kg charges, they instead placed 1 kg charges in the gun barrels.  With the breeches open, the inside of the cupola was damaged, and the crew abandoned the guns.  Not content with the damage, at 6:45 the Germans used a 50kg charge on the turret.  The Belgians got one of the guns back in working order but wouldn't use is because they had been ordered not to fire on Dutch territory.  Finally, at around 9:30, the guns were destroyed with multiple charges exploded in each barrel.  

After about fifteen minutes from the start of fighting, Stukas were arriving, only to find that their targets had swastikas on top of them.  The dive bombers instead attacked Bloc 1 and other outer defenses.  With the fort neutralized, around 60 Germans were remaining atop the fort with several times that number of Belgians inside.  At 5:00am on May 11th, the German glider men were relieved by infantry.  After noon, Maj. Jottrand surrendered the fort.  The German glider force that attacked the fort had lost six killed and 18 wounded.  The garrison suffered 21 killed and 61 wounded.


The incredible German victory at Eben Emael opened up Belgium to invasion, which lured the French and British armies deep in Belgium, just as the Germans had hoped.  After the panzer-lead penetration of the Allied lines around Dinant, Montherme, and Sedan the Germans didn't stop until they reached the English Channel, cutting off the BEF and the best troops in the French army.


Bloc 01

Separated from the rest of the fort, Bloc 01 did not figure prominently in the battle, but it is well worth a visit for the view of the canal, the Meuse River, and even into Germany on a clear day.


Interior Views:


Double armored doors like these were used to seal off a gun emplacement that had been knocked out of action.  Between these doors and another set of doors was a gap of two meters that would be filled with sand bags.  The photo at right is of the feature on the left of the panorama.  Note the ammunition cart.  These were used to move ammo from magazines to the hoists which would lift it to the fighting emplacements.

The photo below also shows this.  The man on the left was our guide, and the two other gentlemen are veterans of the Belgian Bn. during the Korean War.  The man with the beret fought from the same bunker as my father at Boomerang.  Between him and the guide, you can see sandbags stacked between the open door and the door beyond.

This is the intermediate level below Maastricht 1.  The right door was blasted off on the morning of May 11th by the Germans using a 50kg charge.  The blast killed six and wounded several other and also blew open calcium chloride barrels, emitting toxic fumes.


Vise 2

The outside of this 3 x 75mm gun position can be seen elsewhere on this page.  The position included two levels, with this being the upper one.  Ammunition was stored on the lower level and brought up by hoist.


Damage from 50kg Charges


Copyright 2010-11 by John Hamill


Back to John's Military History Tour of Europe