Imperial Guard Attacks


The French artillery bombardments and cavalry attacks wore down Wellington's center, but the Allied army did not break.  With Blucher's Prussians attacking his right, Napoleon had already committed most of his reserve, and he had little time left to defeat Wellington before an otherwise inevitable defeat.     


La Haye Sainte

With the capture of La Haye Sainte, the French now placed artillery just a few hundred yards away from Wellington's center.  Now was the time for Napoleon to order Reille's and D'Erlon's Corps forward and commit his Imperial Guard in an attack Wellington's center.


Napoleon kept two battalions of the Old Guard near La Belle Alliance and ordered nine battalions forward, five battalions of the Middle Guard in a front line and four battalions, one of the Middle and three of the Old Guard, in a second line 3-400 yards back.  The battalions attacked in squares, not columns.  It was around 7:30pm.  In this nearly 360 degree view, the Guard advanced along the road from La Belle Alliance, then deployed into the field on the left of the panorama.  The battalions then advanced toward Wellington's ridge, on either side of the Mound.  Realizing the seriousness of the situation, Napoleon accompanied his Guard from the ridge near La Belle Alliance to the low ridge here that overlooks La Haye Sainte.


View From The Mound

To face the attack, Wellington brought forward 4,000 men of his British infantry in three brigades - Adam,Maitland, and Halkett - deployed in four ranks on a front of about 1,000 yards.  The line would have been along the road on the left extending to the intersection, a stretch of road that was sunken at the time, extending along the lane on the right of the panorama.

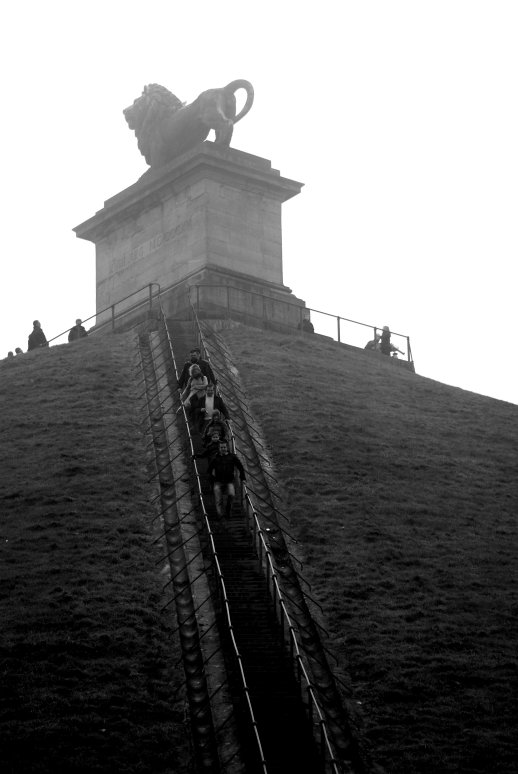
If the French had expected the attack to succeed by intimidation, they were mistaken.  Halkett's brigade was the first to be attacked, and the Middle Guard halted to return fire.  Halkett had gone forward in front of the sunken road, and when ordered to withdraw, confusion ensued, and the small brigade fled behind the sunken road.  Halkett rallied his me, and the Prince of Orange was wounded (on the site of the mound), but it was the arrival of Chasse's division of Dutch-Belgians that saved the line here.

Elsewhere, toward the right of the panorama, the French squares were advancing against Maitland's brigade of guards.  At a range of about 50 yards, Wellington himself gave the order to fire.  Halting to return fire rather than press the attack, the French attack stalled.  When the French tried to deploy into line, the British Guards attacked with the bayonet on Wellington's order.  The French square fled to the rear.  Maitland, however, now faced the French squares of their second line, so the British fell back to the sunken road in some confusion.  To their right, however, Adam's brigade found itself without any French to their front after repulsing the enemy skirmishers.  Col. Colborne of the 52nd Regiment ordered his men forward to fire into the flank of the 4th Chasseurs.  A well timed bayonet attack put the French square to flight.

The Imperial Guard had failed, and panic set in amongst the French army. 


French Imperial Guard Monument - Wounded Eagle

By now it was around 8pm.  Sensing the panic in the French army, Wellington ordered his whole army to attack.  Uxbridge was wounded, losing a leg to French artillery.  Exhausted, most of the Allied army went no further than La Belle Alliance, one of the locations that Wellington and Blucher may have met.  Although the vast majority of the French army was fleeing in panic, the four Imperial Guard battalions for the second line of the final attack remained solid, retreating in good order.  Attacking Allied cavalry were repulsed attacking the squares.  Only at nightfall did the guardsmen break ranks and join the confused retreat.  General Cambronne of the 2nd Bn / 1st Chasseurs, when asked to surrender, is reported to have either replied "The Old Guard dies, but it does not surrender!" or the less noble, "Merde!".  Despite the heroics, he too was eventually captured.


Wellington and Blucher met, perhaps at the appropriately named tavern "La Belle Allaince" but more likely at a location further south.  The Prussians, it was agreed, would pursue.  The battle had been particularly bloody, even by Napoleonic standards.  Wellington had lost a quarter of his men, around 17,000 men.  Blucher lost about 7,000.  Napoleon lost around 25,000 men, of which 6-7,000 were captured.  More importantly, the army was smashed.  Only 30,000 men mustered on June 22nd.  Fortresses surrendered as Blucher and Wellington advanced on Paris.  With support crumbling, Napoleon once again abdicated.  This time, though, he was safely incarcerated on the South Atlantic island of St. Helena, where he would die several years later.  Weary of the nearly endless wars from 1792 to 1815, Europe entered a time of relative peace.  Although there would be conflict, the next massive cataclysm of war would wait nearly another century.


Copyright 2010-11 by John Hamill


Back to Waterloo