Fort de Loncin
August 4-25, 1914


    With the start of the Great War in the summer of 1914, Germany faced enemies on two fronts - the Russians and the French.  The Russians would be slower to mobilize, so Germany decided to strike the French, knocking them out of the war, then turning on Russia.  This plan, the Schieffen Plan, sought to avoid French strength along the French-German border by violating Belgian neutrality, swinging through the small country and into France.  Doing this had a serious drawback as the Germans would face Belgian fortifications, especially the twelve forts around Liege but also around Namur and Antwerp.  Designed by Henri Brialmont, the fortifications were revolutionary for their time and well respected.  Designed to be used along with troops positioned between the forts, the guns within the forts were to support these infantrymen and suppress enemy artillery.  Unfortunately, there were gaps between the forts not covered by the forts' artillery.  In addition, when forward observation posts were captured, targeting the forts' artillery became difficult.  Although the Brialmont forts would prove to be inadequate and deeply flawed, the Germans would suffer heavy losses attacking them and lose valuable time in reducing them.

    The Germans crossed the Belgian border on August 4th and began probing the Liege forts the next day. With the loss of some of the forts, the comander of Liege, General Leman moved to Fort Loncin.  The Germans still needed to capture them all to secure their advance, so they now began using their heavy artillery, up to 420mm in caliber with rounds weighing around 1,600 pounds.  On August 15th, the magazine of Fort de Loncin was hit, setting off 24,000 pounds of explosives and destroying much of the fort while killing 350 men of the survivors of the original garrison of 550.  The explosion rendered the fort indefensible, and surrender quickly followed.  

    Fort Loncin is an excellent example of the Brialmont forts, and it is now a museum that is well worth a visit.  


    This model gives a good idea of the fort's design, a triangle with a 300 meter base and 235 meter sides.  We are looking at the fort from its front.  Like older forts, there is a ditch and a cleared field of fire - the glacis.  Barbed wire on the glacis was a barrier to attacking enemy infantry.  At each corner of the fort there are casemates with weapons positioned to fire along the ditch.  On top of the fort there are fighting positions for the infantry, but the infantry had no overhead protection.  Unlike older forts, the artillery was larger in size and fewer in number.  The guns were concentrated in the fort's central massif, and they were protected by concrete.  Brialmont hoped that enemy artillery projectiles would bounce off the concrete.  In reality, however, because the cement had been poured in layers, the concrete in Brialmont forts tended to flake off.  The concrete was not covered with earth, something which could have provided additional protection.  Concrete with metal reinforcing, much stronger than the concrete used here, had not yet been invented when the fort was built.  Although tests had been done that showed the forts' concrete was vulnerable to artillery even of 150mm size, no improvements were made.  1880s technology would have to do.


This is the fort's rear entrance.  The entrance is covered by a firing position on its flank, and it also featured a rolling bridge which could be withdrawn, leaving a pit.  The fort is designed with few defenses to its rear so that it would be easier to recapture if the enemy captured the fort.  Next, we will enter the fort.


We entered the fort through the entrance at left.  Any attacker who managed to enter the fort here would face the gorge front - the wall to their front with the central massif behind - and be faced with enfilade fire from both sides.  The men lived underground inside the gorge front.  Since the Germans penetrated between the forts and into Liege, they bombarded some Brialmont forts from the rear, damaging the gorge front enough to drive the garrison deep into the fort.  Fort de Loncin would suffer another fate entirely.

The entrance to the central massif, the modern steps in the center of the panorama, was offset from the fort's entrance in order to protect it from direct fire through the entrance.  The central massif looks much different now compared to when the fort was new.  Knowing that the Brialmont forts were designed against 200mm rounds, the Germans brought 420mm howitzers into Belgium.  A lucky round penetrated the fort, setting off the magazine and wrecking the central massif.

A little later we will climb the modern bright white steps and take the path through the ruins of the fort.  There we will see a panorama from the white steps visible above and to the right of the statue in the middle of the panorama.  This is the location of the searchlight.  First, though, let's go inside the gorge front section of the central massif.


This is an example of a casemate within the central massif.  Note the crack at right, likely a result of the magazine explosion.


This is a 180 degree view of a corridor within the central massif.  The stairs at right lead up to fort's left 57mm turret.  Later on we will see the outside of the right 57mm turret, but first let's cross the gorge ditch and go inside to see the bathroom.


So you weren't expecting to see the toilette?  Some of the Brialmont forts had a serious flaw regarding the bathroom.  In these forts the bathroom facilities were located separate from the men in the central massif, forcing them to go outside under enemy fire to reach the sanitary facilities.  Instead many of the men relieved themselves where they were, which created serious sanitation and health problems.  The smell of their own waste, combined with smoke from firing artillery, contributed to the surrender of some Brialmont forts.


Searchlight

In this 360 degree view, you can see where we entered the fort on the right side.   On the left side of the panorama you can see the ruins of a stairway passage through the concrete leading to the powered searchlight turret.  This armored turret was able to move 360 degrees and housed a light like the one pictured in the photo at right, an electric one that could illuminate enemy infantry at distances of 2-3 km.  A steam engine turned a dynamo that furnished the power to the light.  Although the addition of a searchlight was a great advance in its time, use of a single light per fort meant that a fort's night fighting ability was gone if the light was destroyed.

To the right of the searchlight in the panorama are the ruins of a 120mm gun turret.  Between our location and 5.7cm turret on the right side of the fort is the massive crater from the explosion of the magazine.  Next we will continue toward the top of the central massif.


This is the 15cm turret in the center of the fort, leaning into a chasm opened up by the explosion inside the fort.  Next we continue up the stairs at right.


Atop the Central Massif
From atop the central massif you can see not only some of the massive damage to the fort, you can also get an idea of what an intact fort looks like.  The 5.7cm turrets are on either flank of the fort.  At right is the chasm that the 15cm turret in the center of the fort is now leaning into.  The 12cm turret looks reasonably intact, but the 21cm turret near the front of the fort was blown skyward by the explosion and landed upside down.  See photo at right.   

Below is a panorama of the other 21cm turret on the fort's right side.  Next we continue to the stairs that lead down to the ditch in fort's front salient.


Front Salient

Each of the three salients had fighting positions designed so that weapons could  fire along the ditch.  As you can see in the model at right, the fighting area was connected to the central massif by a tunnel.  These casemates were positioned so that they were hidden from enemy artillery fire from in front of the fort.  In the event that the enemy was able to cross the ditch, barbed wire or thorn bushes faced any enemy climbing the earthen scarp on their way to the top of the fort.  This area is now wooded.


The panorama at left is the inside of the front salient.  5.7cm rapid fire guns like the one in the photo at right were mounted in the two story casemate and dominated the ditch.

Next, we climb the steps and walk toward the right 57mm turret.


We are now at the infantry fighting position on top of the fort.  At center and right of the panorama you can see the damage to the central massif.  Now we will continue walking to just beyond the 57mm turret.


57mm Turret

Here on the right side of the fort can be seen the 57mm turret, which was meant for close-in defense against enemy infantry.  Unseen below this exterior is the mechanism to raise, lower, and rotate the turret.  See model at right.  The turrets in the Brialmont forts featured steel armor that extended into the concrete.  This prevented the turret from being moved significantly off center if the concrete was destroyed.


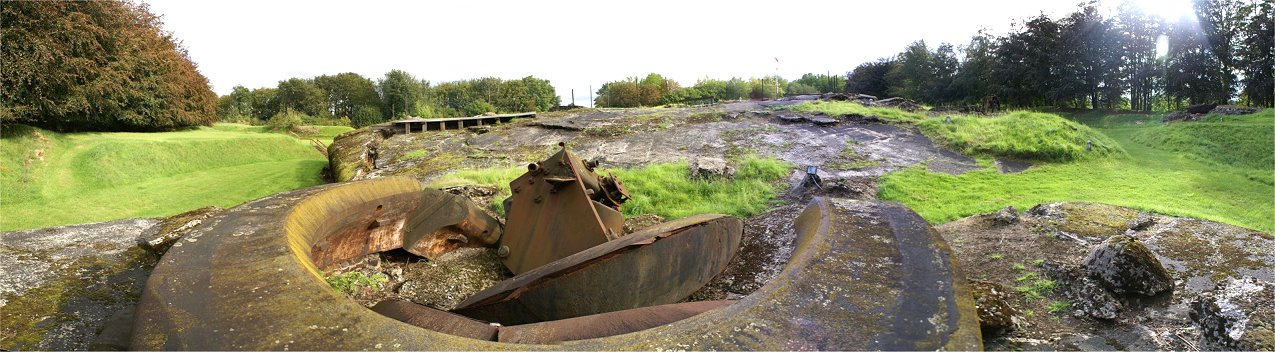
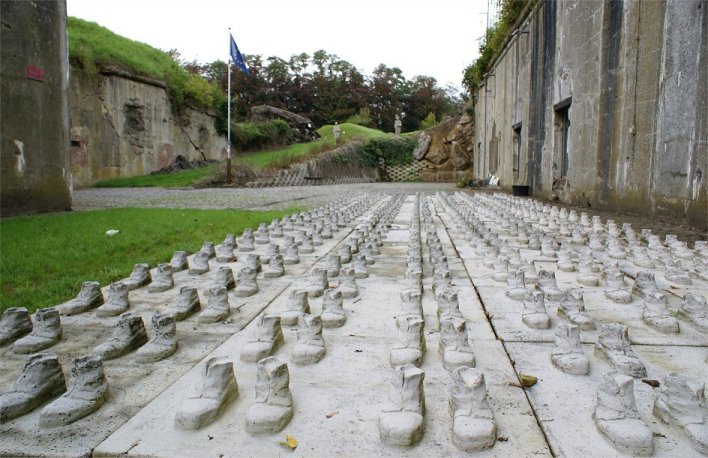
Around 300 of the 550 man garrison died during the battle.  Invited by the Germans to see the damage at Fort Loncin, defenders of the other of the two remaining Liege forts also surrendered.  Although the Brialmont forts were flawed in many ways and fell to the German attack, many historians believe that the delay that the Germans incurred while reducing the Belgian forts gave the Allies vitally important time 
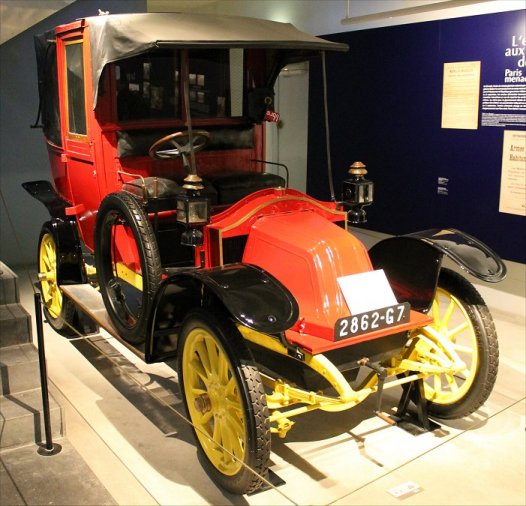
necessary to respond to the German invasion of France.  With the Germans approaching Paris, the French shifted troops, including with Paris taxi cabs like the one at right.  The British had time to cross the Channel and prepare for battle.  In the Battle of the Marne, the Allies counterattacked an overextended German army, halting their advance and saving France, and perhaps democracy itself, from catastrophic defeat.    

Sadly France took the wrong lessons from the Brialmont forts.  Instead of seeing that forts needed to be well designed and technologically up to date, the French concluded that permanent fortifications were obsolete.  They stripped their forts at Verdun of weapons and men, an error that they would pay dearly for. 


Copyright 2012 by John Hamill


Back to John's Military History Tour of Europe