St. Malo


August 4 - September 2, 1944


With the Cobra breakout of July 25, 1944, the American army reached 
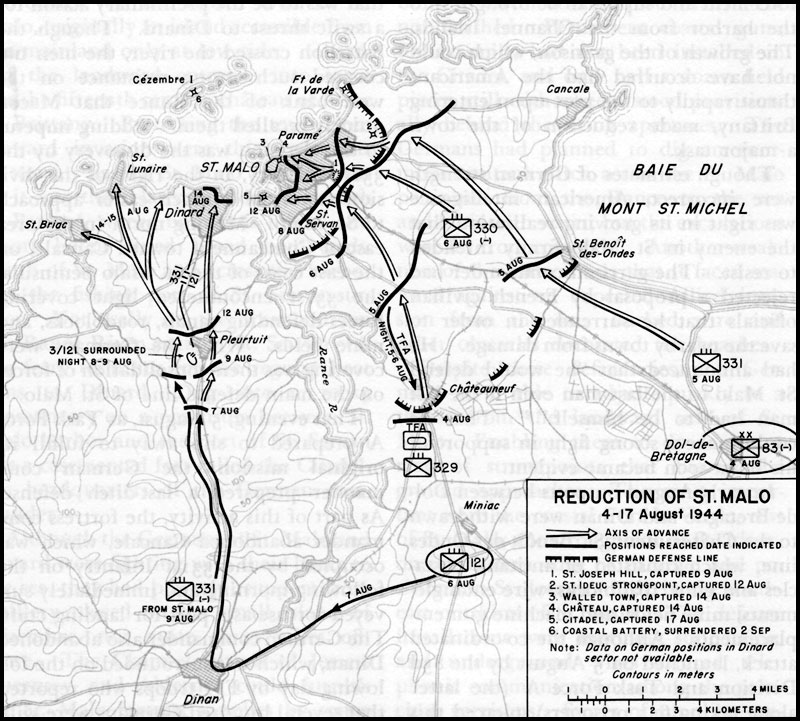
open country on July 31st.  Patton sent the 6th Armored Division west 
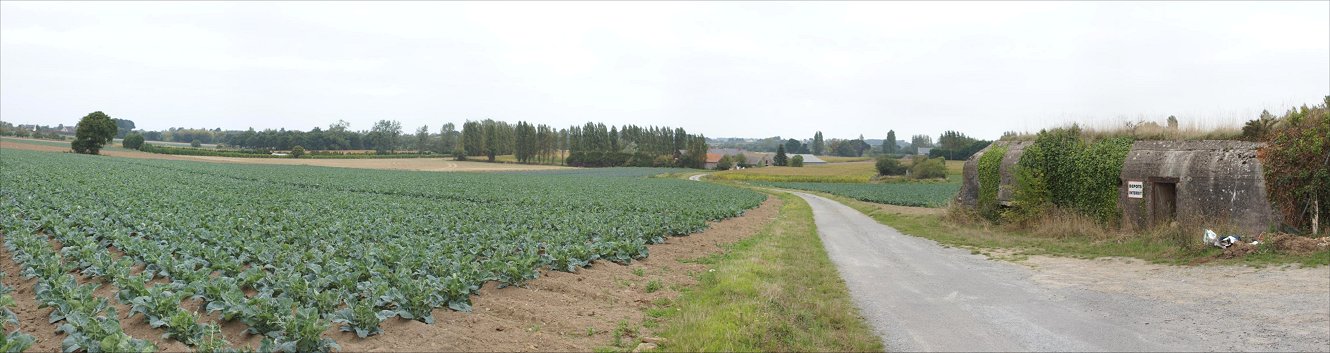
to seize the large Breton port city of Brest.  Leading the way, 
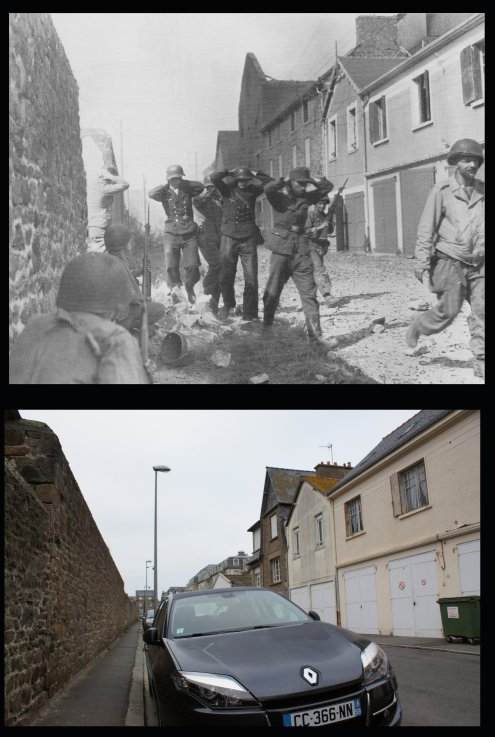
Task Force A clashed with German 
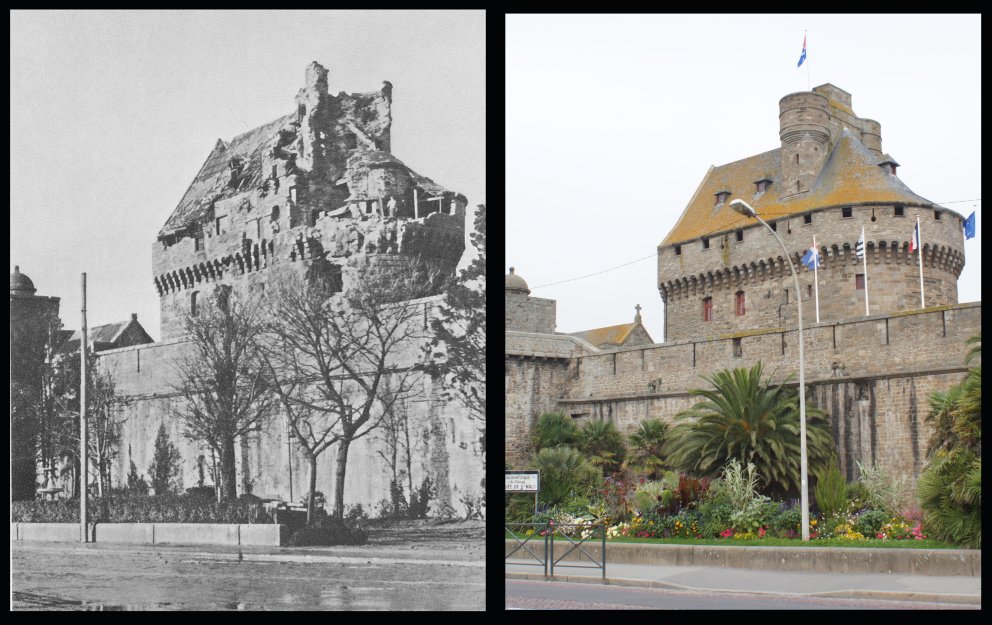
troops outside of St Malo and requested reinforcements.  Patton believed that the isolated port city would surrender without much of a fight, so he only sent one regiment of the 83rd Division to reinforce the men at St. Malo.  Pushing back a German outpost on August 4th, the Americans met heavy resistance at the outer German defenses.  The commander of VIII Corps, Troy Middleton, ordered the rest of Gen Macon's 83rd Division to attack the next day, August 5th.  This attack by all three of the 
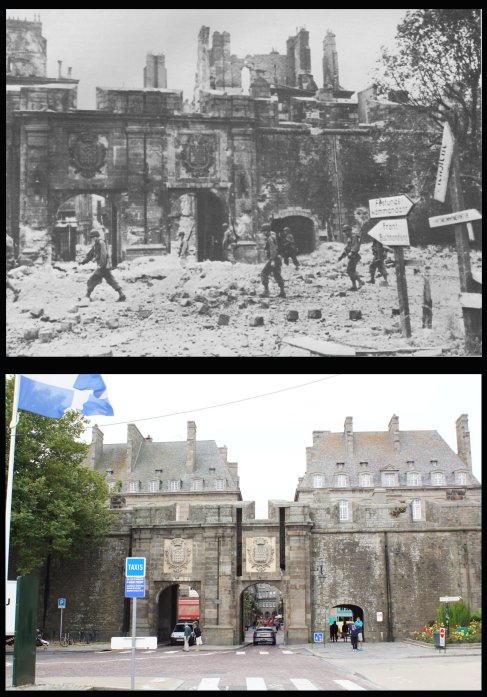
division's infantry regiments pushed the Germans back to their main line of defense, but it became clear that the reduction of St Malo would not be easy, and the Germans evacuated the city's civilian population.  A battalion had crossed the Rance River that day in boats, but they returned after meeting heavy resistance.  Task Force A left to continue its advance toward Brest, leaving the 83rd Division to take St Malo, though to be defended by 3-6,000 Germans.  In actuality, there were around 10,000 German defenders.

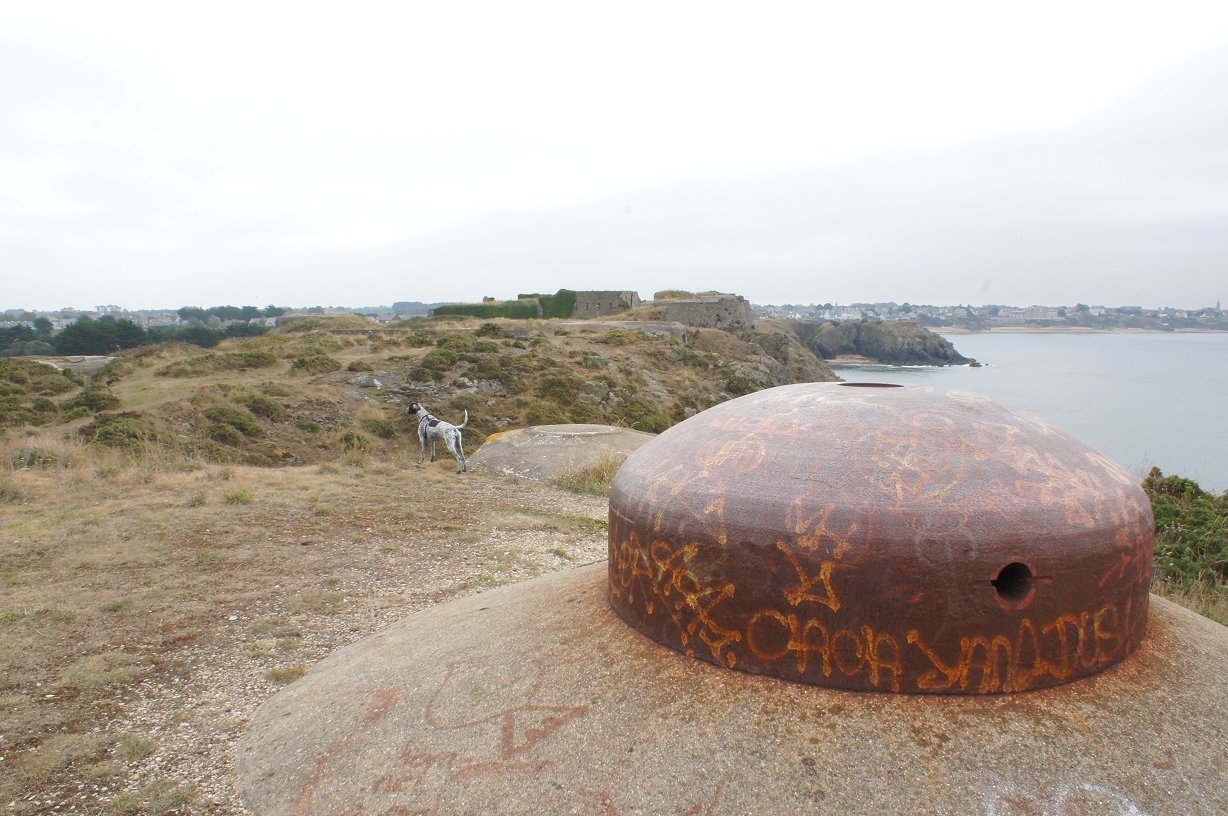
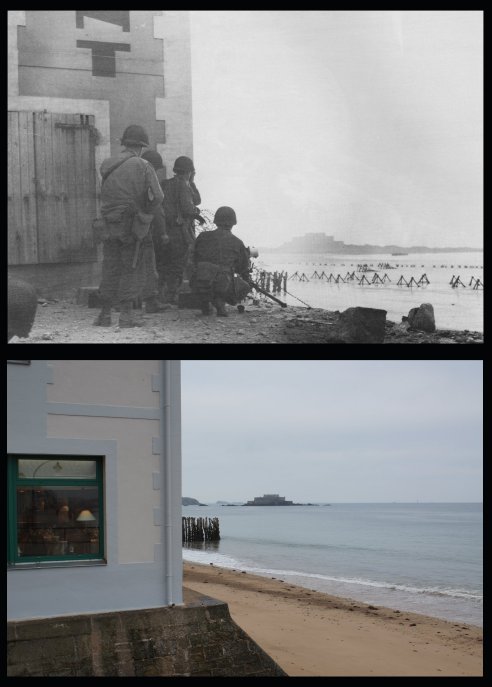
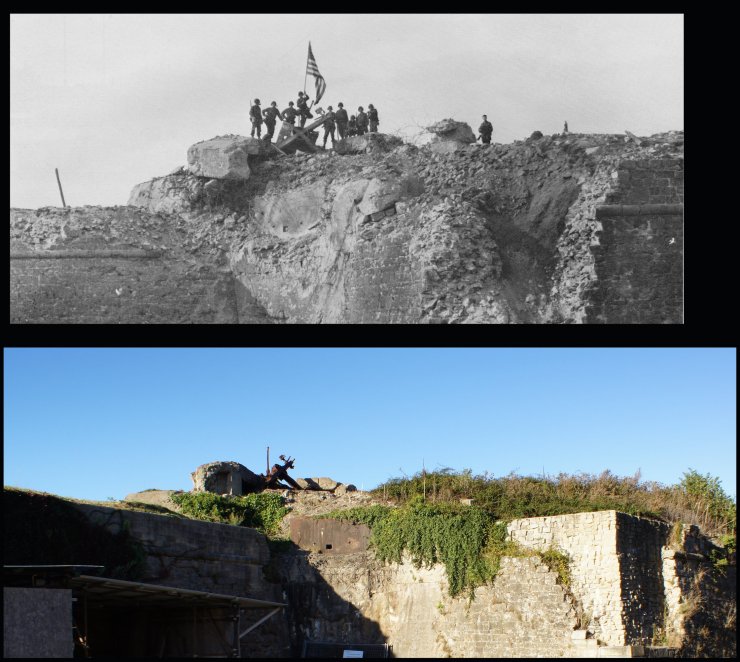
On August 6th, the Americans attacked the main German defenses but were repulsed.  German artillery from Cezembre Island started a fire in old town St Malo.  The Americans had cut off the city's water 
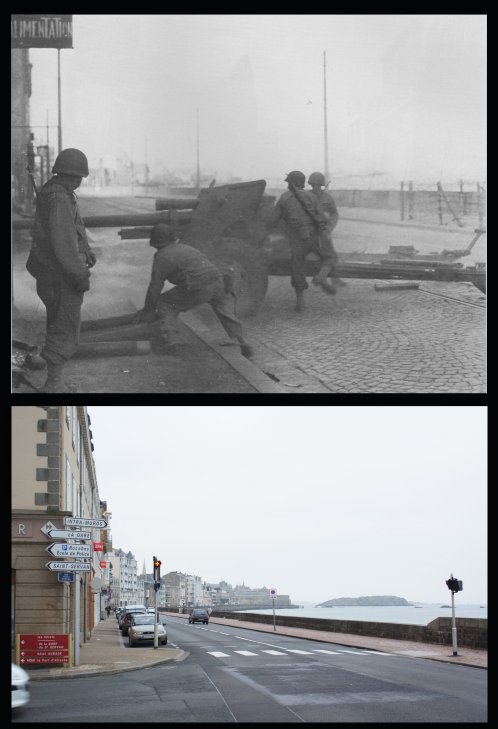
supply, so the fire spread, and the next day, the Germans began demolishing the port facilities.  The fight was clearly going to be difficult, so Middleton reinforced the effort with the 121st Infantry of the 8th Division, a battalion of corps artillery, and a medium tank company.    On August 7th, the 121st  crossed the Rance and began attacking toward Dinard to capture the west bank of the river and to seal off any German escape.


St. Joseph's Hill

Also on August 7th, attacks continued on St Malo main line of defense, and the 330th Regiment eventually captured St Joseph's Hill, the key to the German outer defenses, along with 3,500 prisoners.  This success was due in no small part to heavy artillery support.  The area includes a quarry, and it confusing for a tourist to make much sense of what happened where, but the panorama above will at least give you an idea of the vicinity of the hill and the rolling nature of the terrain.  


St Ideuc

With the fall of St Joseph's Hill, the Germans at St Ideuc were surrounded.  This area is near the prominent radio mast on the high point behind the builder yard behind the bunker.  When St Ideuc was captured in the afternoon of August 12th along with 160 defenders, Fort de la Varde on the coast could be attacked.


Fort de la Varde

Built on a small peninsula dominating sea approaches to St Malo, Ft de la Varde was modified by the occupying Germans.  Isolated, the fort fought on until August 13th, when just over one hundred defenders surrendered.  Meanwhile, American troops had advanced into into Parame, visible in the background of the photo - a suburb of St Malo. 


Parame

Not much changes in France.  This street scene looks much as it did on August 8th when men from Company I, 331st Regiment was moving east from the Eglise de Parame on Rue de la Gardelle.


Parame

Not far away, this photo was taken on August 9th on Place Poincare.  The Americans continued their advance toward the old town of St Malo.


Rue de Hippolyte de la Morvonnais

A French army barracks occupied by the Germans was scene to this surrender photo.  Note Germans emerging from a breach in the stone wall.


Not much changes in France, but this area has changed some.  Just off the Chausee du Sillon near the end of the Digue de Rochebonne, Americans point a machine gun at Fort National.  No Germans were in the fort.  Note the significant beach defenses.


A 3 inch anti-tank gun in action at the intersection of the Chausee du Sillon and the Place de la Fontaine.


Porte St-Vincent

Old town St Malo had formerly been an island, but it was now connected to Parame on the mainland by a narrow causeway.  To capture old town St Malo, the Americans had to attack across this causeway and capture the city walls and adjacent castle.  Blasting holes between houses, the Americans slowly advanced on old town, supported by tanks and tank destroyers.  On August 11th, the Americans captured a casino about 1,000 yards from old town, but the ground was now open and protected by a minefield.


Chateau de St-Malo

Armed with machine guns and a 20mm cannon, the chateau was a formidable position.  The Americans bombarded the castle with 3 inch rounds from tank destroyers, 8 inch artillery rounds, various other artillery, plus air attacks by heavy and medium bombers.  With fires raging in old town, a truce on August 13th allowed around 1,000 remaining civilians to escape along with about 500 hostages and prisoners held in a small fort offshore.

On the morning of August 14th, the 330th Regiment attacked and penetrated through the city walls and past the castle.  That afternoon, the roughly 150 German defenders of the castle surrendered.  The next day, at low tide, the otherwise offshore islands of Grand Bey and Fort National were attacked.  Fort National was not occupied, but 150 Germans on Grand Bey surrendered.  Old town was liberated but completely ruined.  Rebuilding lasted until 1960.

Dinard and surrounding areas across the Rance had been liberated by August 15th, but the citadel of St Malo remained.


Citadel

Dominating the entrance to the Rance, the 18th century citadel was formidable, modified by the Germans with reinforced concrete positions.  It was precisely because of the citadel that Troy Middleton had allocated heavy corps artillery to St Malo.  Supply difficulties were already facing the Allies, and an August 9th attack on the citadel was not preceded by a preliminary artillery bombardment.  Air attack had little effect, with 1,000 pound bombs doing little damage.  PysychOps also failed to get the citadel to surrender.  A German chaplain was unable to convince the German commander, von Auloch, to surrender.  A phone call from Aulock's French mistress was also unable to convince von Aulock to surrender.  Von Aulock, pre-war, had been employed by General Motors.


Citadel Courtyard


On August 11th, a company of the 329th Infantry attacked the citadel after an aerial bombardment.  The walls had been damaged, and about 30 men, including three Frenchmen, entered the courtyard, where they saw no damage from the aerial assault.  Unable to demolish the defenses, the men retired after the Germans opened heavy fire on them.

For two days, Allied artillery and tank destroyers bombarded the fort.  On August 13th, medium bombers once again attacked the citadel, followed by a brief armistice to evacuate old town St Malo.  On August 15th, medium bombers again visited the citadel, then special assault teams entered the citadel, but they were soon driven back.  

The bombardment continued, with heavy artillery firing from less than a mile away.  Just minutes before another scheduled air bombardment, von Aulock put up the white flag and surrendered.  Damage to firing positions from close in artillery plus low morale led the German commander to surrender.  


From just outside the land face, a damaged German 40mm position is still in place.


The German positions within the citadel are now a museum.  Old town St Malo is visible in the left background of the photo.


A walk around the citadel reveals a number of steel firing positions showing significant damage.
In one case, a projectile is still embedded in the steel.


View From Citadel


Cezembre Island

Germans on Cezembre island had supported the citadel as it was under attack.  They also dominated the harbor, preventing its use by the Allies.  Just half a mile long and a quarter mile wide, it had been converted into a fortress.  Subject to aerial bombardment on August 6th and 11th, with the capture of the citadel, Cezembre was now subject to artillery fire.  Asked to surrender, the response was the same that von Aulock had given, "A German officer never surrenders."  Starting on August 17th , napalm was dropped on the island - the first combat use of the weapon.  The 330th Regiment was training for an amphibious assault on the island, but fortunately it became unnecessary.  On September 2nd, the white flag was raised, and the 321 survivors were evacuated.  The reason for the surrender was that the water processing equipment had been damaged.


The harbor was wreaked, and by this point the Allied armies were well on their way to Germany.  St Malo was never used to supply the Allies armies.  Similarly, Brest, captured on September 19th, was also never used as a port by the Allies, and Operation Chastity, a plan to build an artificial port on the Breton coast, was canceled.  Brittany had become a backwater.


Copyright 2015 by John Hamill


Back to John's Military History Tour of Europe