Brandy Station Part 2
Duffie Repulsed
Meanwhile, the divisions of Gregg and Duffie had crossed the river six miles east. Gregg was delayed when Duffie temporarily got lost. Stuart had dispatched Robertson's brigade to cover Kelly's Ford when the battle began, but he was stopped by Union infantry and his troops contributed little in the battle.
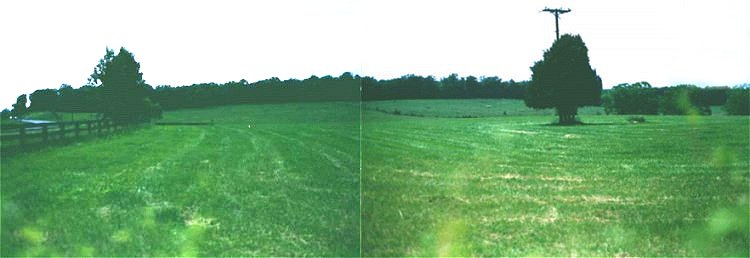
Gregg moved directly toward Brandy Station while Duffie moved toward Stevensburg. Duffie's men advanced down the road visible on the left of the picture and met Confederate defenders along Hansborough Ridge visible in the distance. The Federals took the ridge and met further resistance, but only by about 500 men, as he moved toward Brandy Station. Duffie then decided to join Gregg instead of strictly following his orders, but as a result he failed to find the Confederate infantry and he was too late to be useful to Gregg.
Wyndham Attacks
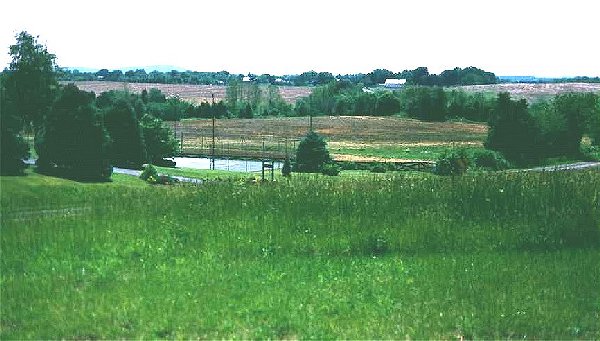
This is a picture looking southwest from Stuart's Headquarters on Fleetwood Hill toward Brandy Station. Gregg's Federal cavalry division left Duffie and headed directly for Brandy Station. Wyndam's brigade deployed about 11 A.M. near town visible in the distance. A sole Confederate 6 pounder howitzer defended Fleetwood Hill. Maj. McClellan of Stuart's staff sent desperate pleas to his chief near St. James' Church to send troops immediately. The gun crew bought just enough time for "Grumble" Jones and part of his brigade to reach Fleetwood Hill. Jones' men repulsed Wyndam's brigade despite the heavy losses of the 12th Va. Cav., which was the first unit to reach the field. Jones' 35th and 6th Va. Cav. counterattacked and pushed Wyndam back. The Rebel counterattack reached and attacked the 6th NY Lt. Artillery on the small hill visible just beyond the tennis court. This battery lost 30 of its 38 men.
Kilpatrick Attacks
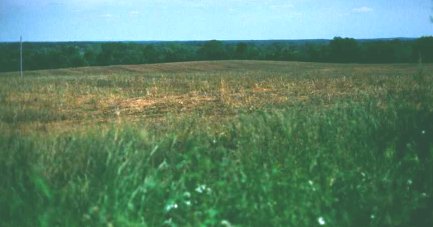
Jones' counterattack was short lived, as Kilpatrick's brigade was reaching the field. Kilpatrick deployed in front of Fleetwood Hill near the distant woods in the picture and attacked toward the cameraman on Fleetwood Hill. (This picture was taken to the left of the previous picture.) Kilpatrick's attack flanked Jones' men, who were forced from the field. Fortunately for Stuart, men from Hampton's brigade were on the way and flanked the advancing Federals who were pushed back. Although the Union cavalry had been pushed back, they remained on the field for much of the day until they were ordered back over the river.
The Union force suffered 866 lost of its 11,000 men while Stuart lost 575 of his 9,500 men in what was the largest cavalry battle ever fought in the Western Hemisphere. Hooker now knew Lee had something planned, but more importantly, Union cavalry had surprised their Confederate counterparts and they had fought well. Many of Lee's previous successes had been made possible by his unquestioned superiority in cavalry. A strong Union cavalry meant Lee no longer had free rein with his plans. Further, many historians think Stuart's controversial actions in the Gettysburg campaign were an attempt to regain his reputation damaged at Brandy Station.
Back to Civil War Virtual Battlefield Tours