Little Round Top
From Devils Den
Hood was wounded early during the advance, leading to confusion within the division. Benning's, Robertson's, and Law's brigades took Devils Den, where this picture was taken. During the fighting, the 4th Maine moved from Devil's Den and made a stand near Plum Run in the Valley of Death in the area of the right of the picture. The 99th Pa. would be sent from further down Houck's Ridge to reinforce this area, and the 6th NJ and 40th NY arrived also. The 44th and 48th Alabama Regiments and reinforcing regiments dislodged the 4th Maine and reinforcing regiments after a twenty minute fight. This area is known as the Slaughter Pen because of the heavy casualties incurred here. With the area cleared, a few regiments of Texans and Alabamans were able to move on toward the summit of Little Round Top.

Little Round Top
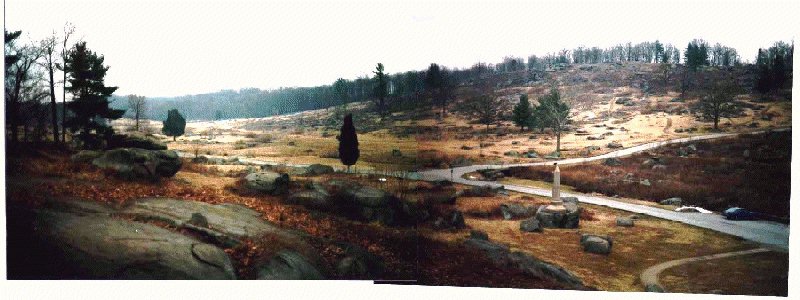
At about 4 P.M. when Longstreet's attack began, Gouverneur Warren, Meade's Chief Engineer, came to Little Round Top, which was unoccupied. Seeing Longstreet's attack, he rushed Vincent and Weed's brigades along with Hazlett's battery here. In this picture, you can see Devils Den below on the left-center as a rock outcropping - and Houck's Ridge which extends to the right. The brigades of Robertson, Law, and Benning took Devils Den and Houck's Ridge. Some of Robertson's Texans crossed the Valley of Death and assaulted Little Round Top's southwestern slope while Law's brigade moved to take the Union flank from the south near the saddle between Little Round Top and Round Top, on the far left.
At the end of the day, after the failed Confederate attacks, Crawford's division of Pennsylvania Reserves attacked across the Valley on the far right of the picture and pushed back the Confederates defending a stone wall on Houck's Ridge. The Rebels fell back across the Wheatfield beyond Houck's Ridge to Rose's Woods.