Charleston
May 12, 1780
By 1779 lack of success in the North and French intervention
forced the British to rethink their strategy. The
South was wealthier than the North, and the capture of a major port
would help the naval war against France. The rich rice producing
lowlands would better support an army and allow for more active
campaigning. Loyalists were more numerous in the South and might
be encouraged to join the cause. Savannah, Georgia had already
been captured, but attempts on Charleston had been so far repulsed.
A larger army with proper naval support might be successful,
however.
Sir Henry Clinton left Sandy Hook outside of New York harbor on the day
after Christmas, 1779, with 8,700 men. Storms scattered
ships and even sank some. Most of the horses were lost, and one
ship was even blown clear across the Atlantic. A majority of the
ships, however, were off the Georgia coast near Savannah by the end of
January 1780. Clinton sent 1,400 men, including his cavalry on a
raid into the Georgia interior and proceeded by sea to
Charleston.

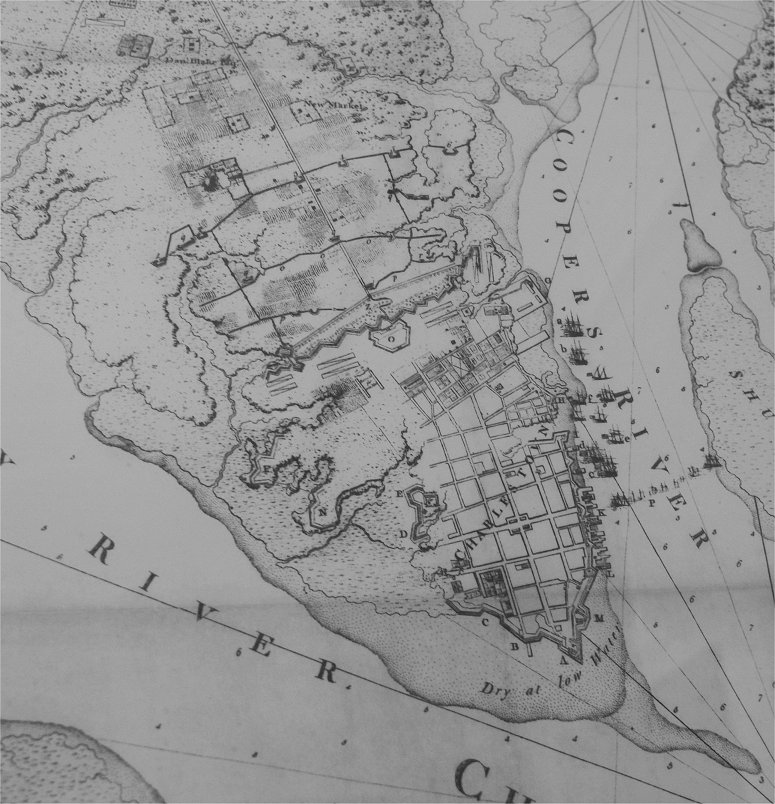
Charleston Harbor
Clinton had commanded the failed 1776 expedition to Charleston, so he
was familiar with the difficulties of capturing the place. The
channel into the harbor followed the coast north until reaching the
harbor entrance. This channel was narrow and could be defended by
a smaller naval force at the bar. If a naval force got to the harbor
entrance, it had to deal with shoals where Ft Sumter would later be
built, and with guns at Ft Moultrie on Sullivan's Island. Once
these obstacles were passed, there was an additional shoal in the
harbor and guns at Ft Johnson on James Island and in Charleston itself.
The American army in Charleston had 3,600 men under Maj Gen
Benjamin Lincoln. Commodore Whipple commanded eight
warships.
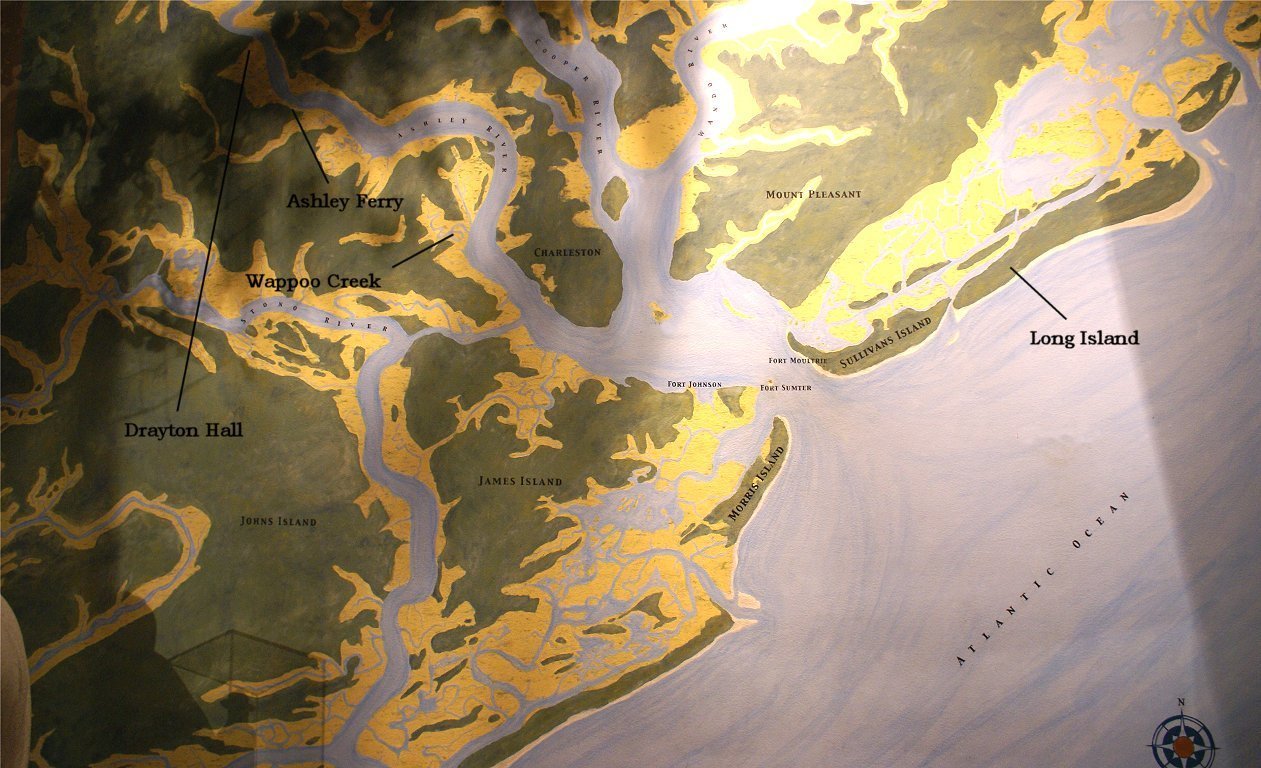
On the advice of a Captain Elphinstone of the Royal Navy, Clinton
decided on an approach up the North Edisto Inlet in order to land
on modern Seabrook Island, just south of John's Island, which was done
on February 11th, just in time to escape another bad storm. James
Island was taken in the coming days, and a bridgehead was established
on the mainland across the Stono River. On March 20th the Royal Navy crossed the
bar and entered the shipping
channel, and in the coming days, the detachment that had raided Georgia
arrived. Clinton was now near to Charleston as the crow flies,
but still separated by the Ashley River, which was a formidable
obstacle on its lower reaches. The Americans were expecting a
crossing near Ashley Ferry. Instead, on the night of March 28th
and 29th, Clinton had 75 flatboats quietly rowed further upstream
to cross at Drayton Hall.
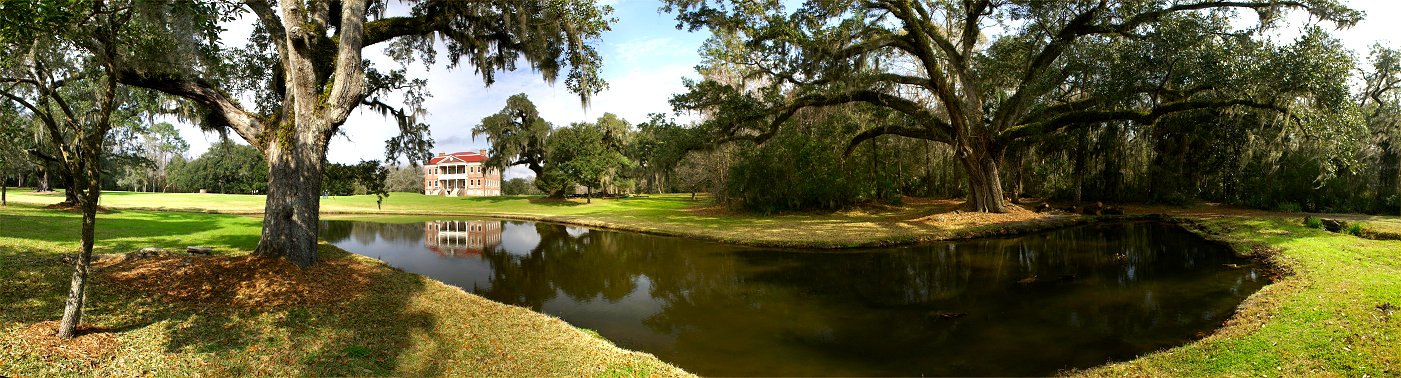
Drayton Hall
The Drayton family was involved with revolutionary politics, so it
should come as no surprise that the British made use of the family
furniture - outdoors.

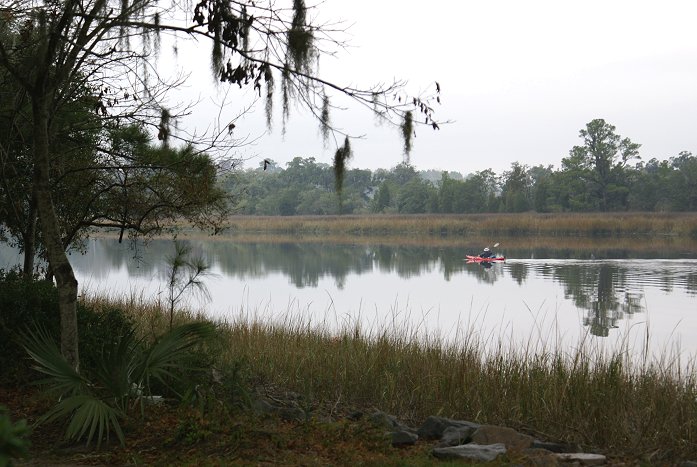
Here, behind Drayton Hall, the British crossed the Ashley River,
paddling a mile upstream to land on firm ground. The only
American defenders in sight were some dragoon, and an American redoubt
was found undefended. Clinton was now 12 miles upstream from
Charleston, and the most obvious American escape route was closed.
On March 30th, Clinton marched on Charleston, and on April 1st, he
broke ground on siege lines. On April 8th, the Royal Navy passed
Ft Moultrie and successful brought Clinton supplies he needed for the
siege. The Charleston defenses were formidable - 66 American guns,
two lines of abatis, a canal serving as a moat, and a stone hornwork in
the center of the line, so when Clinton asked Lincoln to surrender on
the 10th after comleting the 1st parallel, the American predictably
declined. A 2nd and a 3rd parallel would be dug, but Clinton had
yet to complete the encirclement.

From Patriot's Point
This is the view from the north side of the Cooper River, modern day
Patriot's Point. Castle Pinckney, then Shute's Folly, is the dark mass below the
sunset at left. The American fleet was in the river behind a log
boom between Shute's Folly (modern Castle Pinckney) and Charleston
while the sailors manned guns ashore protecting the city. The
British main camp was on the peninsula in the area of the modern
suspension bridge. Clinton sent a portion of his force upstream then across the
Cooper River to cut off American supplies and reinforcements coming
from the north. The Brits won a victory at Monck's Corner on
April 14th, and by the 25th, the British marines occupied the riverbank
across from Charleston, Lempriere's Point, beyond the modern
suspension bridge, and Hadrell's Point, which is off the panorama
to the left. The marines were later replaced by army troops.
On May 7th, Ft Moultrie was taken by marines.
The garrison of Charleston was now trapped, with the only hope
being a breakout. Civilian leadership had opposed evacuation,
and now that evacuation was impossible, they opposed a break out.
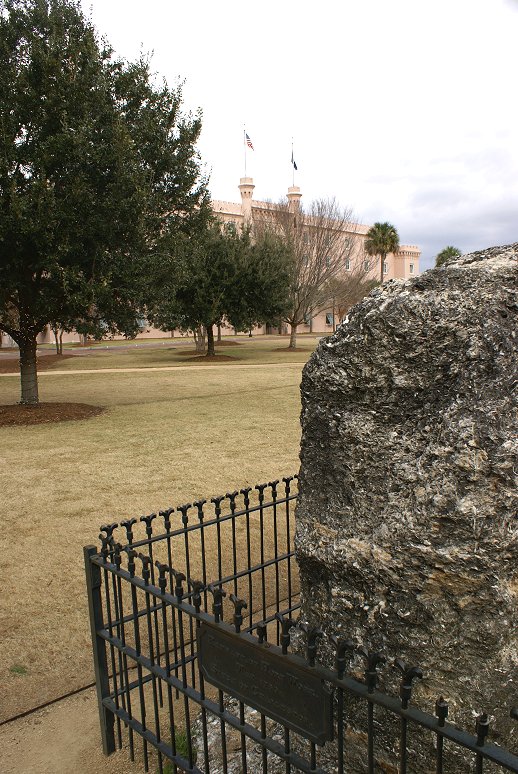
Hornwork
A small portion of the hornwork, or citadel, protecting Charleston
still remains. There are no other modern reminders of the siege.
On April 24th, an American sortie damaged some of the British
works, but they were repaired and work continued. On May 1st,
the British sap reached and began destroying the dam
that kept water in the American ditch. Meanwhile, the
British were also digging the 3rd parallel. Rifle fire was taking
a toll in the American trenches even through the gap of just
a few inches between the parapet and the sandbags that had
been placed above the parapet. Although the British troops
were eager to storm the town, Clinton was not, so on May 8th, he sent
another summons to surrender. With the situation clearly
hopeless, Lincoln entered into negotiations, but he rejected the harsh
British terms. The siege continued on the 9th, and the British
saps continued forward through the American abatis to within 30 paces
of the American lines. On the 10th, the militia abandoned the
trenches and could not be persuaded to return. The next day, the
civilian authorities made it known that it was time to surrender.
Many of the American guns had been disabled, the city had been
bombarded. Meat was scarce. So on the afternoon of the 11th,
the white flag was shown, and Lincoln made it known that he would accept
Clinton's previous offer. The American regulars, only 1,500
to 1,600 Continentals weren't sick, marched out and laid down their
arms the next day. They would become prisoners of war. The
militia laid down their arms in town. They were paroled. After the surrender, an
explosion of gunpowder in Charleston near a poorhouse and a
whorehouse caused many needless casualties.

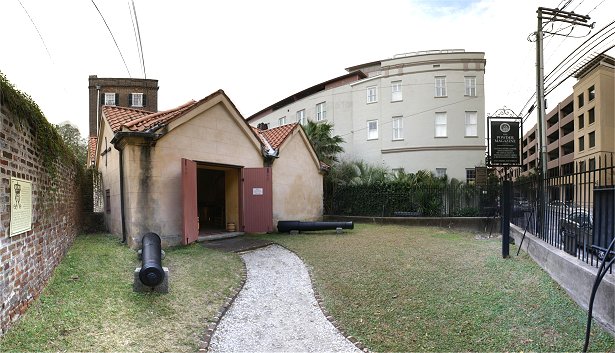
Powder Magazine
Exchange Building
Not all the powder was blown up. Before the surrender, Gen
Moultrie had gunpowder taken from Charleston's Powder Magazine and
placed under the Exchange Building and bricked up. British
headquarters were located in the building until evacuation in 1783, but
the powder was never discovered.
Waxhaws May 29, 1780
The British moved inland to occupy the colony. Lt Col Banastre
Tarleton with the British Legion pursued, and on May 29, caught a
Virginia infantry battalion under Col Abraham Buford at Waxhaws.
The
British cavalry charged into the patriot infantry line,
which waited too late to fire. Tarleton's victory was total.
With
the loss of only 4 killed and 13 wounded, Tarleton killed 113
Americans and wounded or captured 203. Of these 203 captured,
150 were too wounded to be moved. In a typical battle of the era,
there would be four or five times more wounded than killed.
Tarleton gained the reputation
of not taking prisoners, and the butchery at Waxhaws would provoke many
reprisals. The war in the South would become a brutal affair.
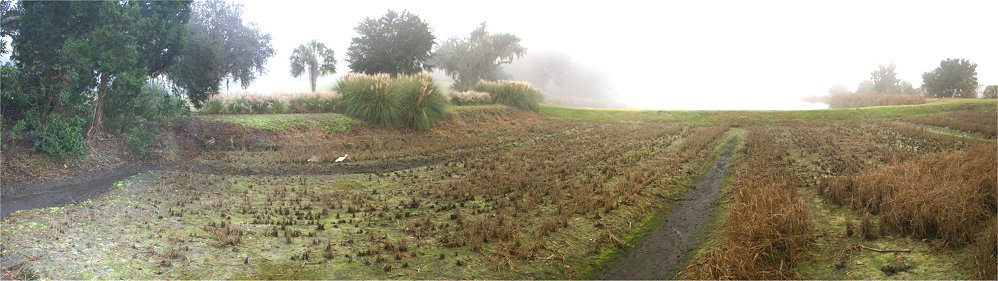
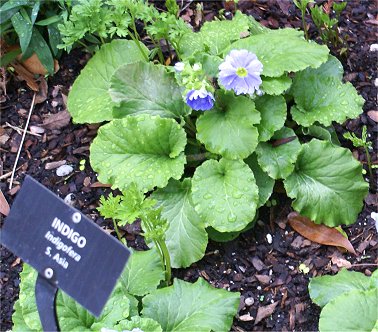
Rice Paddy at Middleton Plantation and Indigo at a Charleston Garden
Clinton left the Carolinas, returning to New York and leaving
Cornwallis in command in the South. South Carolina was now largely defenseless
to British invasion, and many people, out of either genuine loyalty or
simply out of self-preservation, proclaimed their loyalty to the King.
A wealthy colony with an abundance of indigo and rice, South
Carolina might provide adequate supplies and funding for active
campaigning year round. North Carolina and Virginia were
poorly protected, and George Washington's northern army would soon
be dealing with problems like Benedict Arnold's attempted
betrayal of West Point and the mutiny of troops
from several states. With everything in their favor, why
did the British fail in the South?
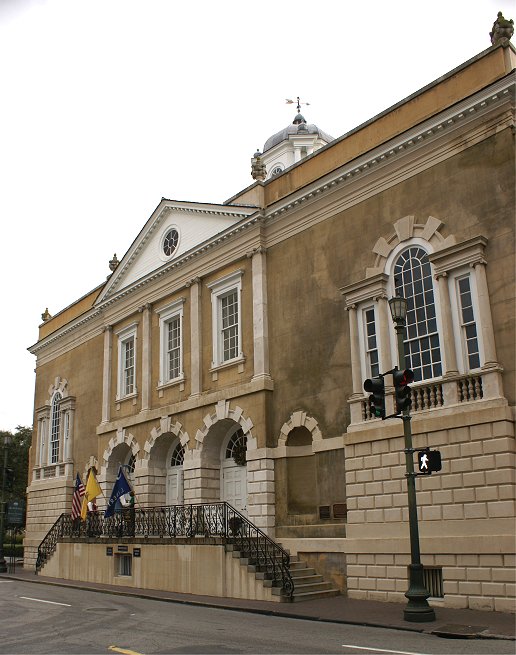
Exchange Building - British Headquarters
The British failed in the South for the same reasons
they failed in the
North. Like in the North, the Loyalist population of the
South was not as numerous as had been believed. As in the
North, British depredations, primarily those of foraging
parties, lost the King friends. Events like the 'Waxhaws
Massacre' became American propaganda victories. And on June 3rd,
before Clinton departed, he issued a proclamation stating that those
who did not return to their allegiance to the king would be treated as
enemies and rebels. You were either with the British or you were
against them. Forced to choose, many men sided with the
rebels. Organizing guerilla bands, they were no match for
regulars, but they hindered British supply and forced the British to
disperse their troops across the colony in an effort to control it.
If the patriots could form another regular army, perhaps the
South could be liberated. Just such an army, under the 'Hero
of Saratoga', Horatio Gates, was being
organized to oppose the redcoats. It would strike at a British
outpost
at Camden in August.