Cowpens
January 17, 1781
The recent book "A Devil of a Whipping: The Battle of Cowpens" by Dr. Lawrence Babits using Dr. Bobby Moss's studies of pension statements and other new sources has drastically revised the traditional version of the Battle of Cowpens. The virtual tour below is intended to reflect this new version and also incorporates some suggestions from John Robertson, who works at the site. For the traditional version, click here. For questions concerning differences between versions, please consult the book, which you should undoubtedly buy and enjoy.
The South was spared the ravages of war for much of the Revolution. A Tory rising was quashed at Moore's Creek, and the British unsuccessfully attacked Charleston in 1776. The British captured Savannah in 1778, and in 1779 a combined American and French force failed to retake the city by storm. Charleston was taken in 1780 and almost all the Virginia Continental Line was captured there. Gen. Gates was sent South but was soundly defeated at Camden in August. Only the mountain men's destruction of Ferguson's column at King's Mountain in October prevented Cornwallis from invading North Carolina in late 1780.
George Washington selected Gen. Nathaniel Greene to command the Southern Army, and Greene joined his army in Charlotte on December 2, 1780. Greene had only about 2,400 men to face Cornwallis' 4,000 men. Stopping Cornwallis with conventional methods would be impossible so Greene detached Gen. Morgan with 600 men into the direction of Ninety-Six while Greene himself moved to Cheraw with 1,100 men. Lt. Col. Henry Lee was sent to assist Francis Marion in raiding British lines of communication in eastern South Carolina. Although Greene had divided his already weak force, it was positioned so that Cornwallis could not advance into North Carolina without exposing his flanks and rear.
In response Cornwallis detached Lt.Col. Banastre Tarleton with 1,100 men to deal with Morgan. Tarleton's force included his Legion with 250 cavalry and no more than 271 infantry, about 50 men of the 17th Lt. Dragoons, 263 men of the 71st Regiment, 177 men of the 7th Regiment, several companies of Light Infantry amounting to no more than 160 men, and two 3 pounders. Morgan withdrew in the face of Tarleton's advance and stripped the country of forage. On January 16th, Morgan stopped five miles short of the Broad River to make a stand. He had 300 Continentals and other reliable troops. Under William Washington, a cousin of George, were 82 Continental cavalrymen, no more than 45 state cavalrymen, and additional militia for a total of no more than 150 men. Militia units had been arriving, and it is now thought Morgan's force totaled around 2,000 men.
The night before the battle, Morgan went to the soldiers' camps and told his men about the battle plan, and he reminded them of Tarleton's massacres and that if they ran, they would be trapped at the Broad River. On the morning of January 17, 1781, Morgan's men had a hearty breakfast and awaited the enemy. Tarleton feared that Morgan would slip away, so he awakened his men at two o'clock in the morning to begin the four mile march to Cowpens. At 6:45, Tarleton's cavalry screen reached the clearing at Cowpens.
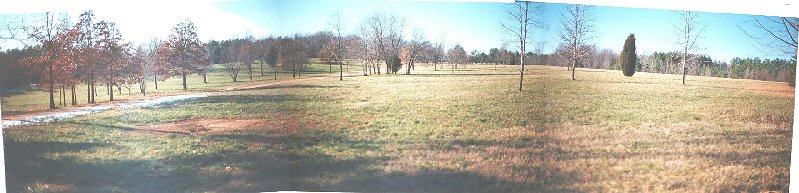
British View of American Position
Tarleton and his men reached this clearing and saw an American force deployed in front of them. This is a view from the right side of the clearing called Hannah's Cowpens. In the flat land in the left-foreground there was low swampy ground known as the rivulet. American riflemen from Georgia and the Carolinas served as a skirmish line behind it further uphill, but also extended toward the woods on the far right of the picture. Further back, behind the small hill on the left of the picture stood the South Carolina militiamen under Gen. Pickens. In the woods beyond, the flank was protected by a ravine with a stream and canebreaks. On the far right near the woods and protecting that flank were two heads of a stream also with canebreaks. The militia line was anchored on each of these obstacles, and was positioned behind the hill because troops firing downhill tend to fire over the enemy's heads.
Behind the militiamen, not visible to the British, but on or beyond a slightly higher extension of the ridge near were it moves back toward the road, were the Continentals and Virginia militia under Lt. Col. John Howard. At the far end of the clearing, and hidden the hill was the cavalry under William Washington.
Tarleton deployed to attack at the near end of the field. Each flank was protected by 50 cavalrymen. The infantry from right to left were the Lt. Infantry, the Legion Infantry, and the 7th Regiment. Two 3 pounders were deployed on either side of the 7th. Further to the left, and somewhat behind, was the 71st Regiment. In reserve were the 200 men of the Legion cavalry.
The British advanced toward the American skirmishers, who after firing a few shots withdrew. Hayes' Bn., one of the four units of Pickens command, had advanced ahead of the line in the area of the picture to the right of the road. The skirmishers withdrew around this unit and to the flanks of Pickens' line, then Hayes fell back into line.
The British infantry continued the advance and were met with a volley at under 100 yards. Despite their high losses, the British kept coming, and the militiamen fell back in confusion behind the Continentals. The Virginia militia units flanking the Continentals had temporarily withdrawn en echelon to allow the passage of the first line militiamen.
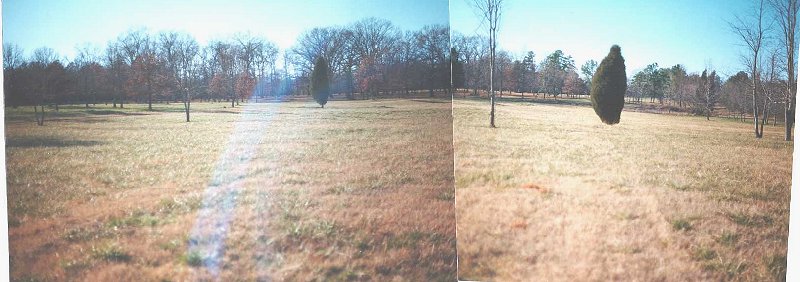
View from British Right Toward Continental Line
Morgan moved to rally Pickens' men. Skirmishers from the front line had withdrawn to Howard's left flank. These men did not have bayonets, and as the British continued to advance, their cavalry rode over the skirmishers and into Pickens' militia in the field around the center of the picture. They came under fire from the Continental line, and Washington came out from hiding with his cavalry, smashed into the British cavalrymen and forced them from the field.
Despite having his flanking cavalry routed, Tarleton continued the advance on the Continental line, possibly not seeing most or all the line and simply pursuing the militiamen. This is a view further up the right side of field. Near here and to the left, the British reformed to attack the Continentals and Virginia militia on or beyond the hill in the distance. The British advanced and exchanged several volleys with the Continentals. On the British left, the 71st Regiment was brought up to flank the American right.
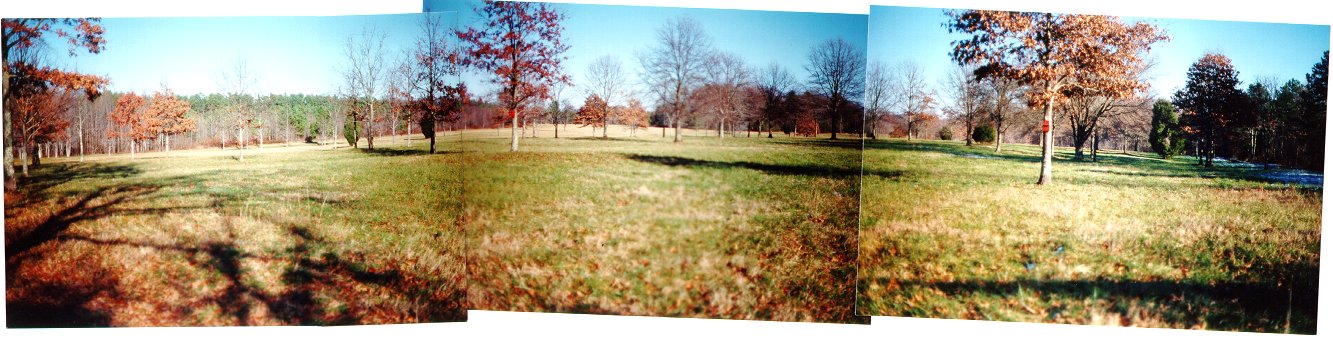
From Near Continental Line Toward British
This picture was taken south of the Washington Light Infantry monument somewhere near where the Continentals fought off the British attack. The actual location may be in a swale to the rear of this area. When the 71st Regiment moved against the American right, Howard ordered the flank refused. This created confusion, and the whole line began to retreat. Seeing this, Morgan selected a new line and had his troops face about and fire. The fire devastated the disorganized British, and Washington's cavalry moved to attack their rear.
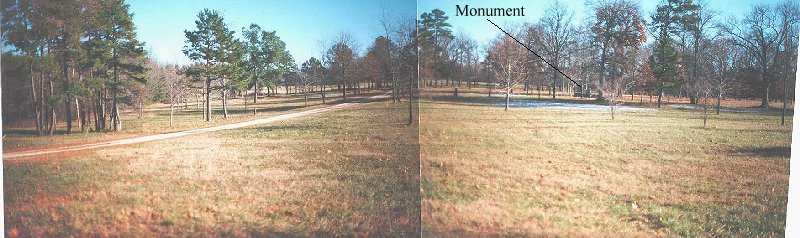
View From Near Washington's First Position
This is a view from behind the hill where the Continentals fought. Washington's cavalry had been stationed near here before they routed Ogilvie's men, probably in the area west of the trail from the visitors center. Their position was concealed from the British but they had cannonballs roll into their position.
From here you can see a monument with surrounding trees on the right of the picture. Near this monument, probably on this side of it - because it is a concealed position, is where the Continentals were positioned, possibly lying on the ground. As the British rushed toward them, the Continentals leveled a devastated fire on the disorganized British. Washington's cavalry had moved to the American right to protect the flank and rear of the militia from the flanking 71st Regiment. Washington smashed into the flanking British cavalry, then moved into the British rear while Howard's line charged. Hundreds of British troops were encircled, and they threw down their weapons to surrender.
Tarleton rushed to his Legion cavalry and ordered them to attack and save the day, but they fled the field. Tarleton instead counterattacked with 54 officers and men, but after some success, was repulsed. The Continentals continued the pursuit and captured the two 3 pounders, their crews fighting to the death.
The battle is a tactical masterpiece admired to this day. The American regulars suffered only 12 killed and 60 wounded, but counting the militia also would probably double the figure. The British suffered 100 killed, 229 wounded, and 600 captured. Only the 200 Legion cavalrymen escaped. Strategically, the British were significantly knocked down to size. Cornwallis pursued but failed to cut off Morgan's retreat. He then burned his baggage, resulting in 250 desertions, and recklessly pursued Morgan and Greene to the Dan River in Virginia. As Cornwallis weakened, Greene got stronger. Already down from 4,000 men to less than 2,000, after Guilford Courthouse, Cornwallis was so weak he couldn't hope to hold North Carolina. Instead, he advanced into Virginia. There, in October, he was forced to surrender at Yorktown.
Back to Revolutionary War Virtual Battlefield Tours